# Installation Guide for Pytorch
## Installation Guide
(updated 2024.4)
This installation guide is for programming deep-learning application using Pytorch
### DLIP 2024-1
Make sure you install the correct software version as instructed.
> For DLIP 2024 Lecture:
>
> * Python 3.9, CUDA 11.8, cuDNN 7.6
> * PyTorch 2.0.x
> * Anaconda for Python 3.9 or Anaconda of Latest Version
```bash
# Install Anaconda from website
# Update CONDA in Base
conda update -n base -c defaults conda
# Create myEnv=py39
conda create -n py39 python=3.9.12
# Activate myEnv
conda activate py39
# Install Numpy, OpenCV, Matplot, Jupyter
conda install -c anaconda seaborn jupyter
pip install opencv-python
# Check GPU model
# Install NVIDIA Driver from Website
# Install CUDA and cuNN
conda install -c anaconda cudatoolkit=11.8 cudnn
# Install PyTorch
conda install -c anaconda cudatoolkit=11.8 cudnn seaborn jupyter
conda install pytorch=2.1 torchvision torchaudio pytorch-cuda=11.8 -c pytorch -c nvidia
pip install torchsummary
# Check Installed Packaged in myENV
conda list all
```
> For DLIP 2022 Lecture:
>
> * Python 3.9, CUDA 10.2, cuDNN 7.6
> * PyTorch 1.9.1
> * Anaconda for Python 3.9 or Anaconda of Latest Version
#### for MacOS
(To be Updated)
The installation is divided by two parts
1. Installing Python Environment
2. Installing Graphic Card and CUDA
3. Installing DL Framework (PyTorch, etc)
***
## Part 1. Installing Python Environment
### Step 1-1. Install Anaconda
**Anaconda** : Python and libraries package installer.
Follow: [How to install Anaconda](https://ykkim.gitbook.io/dlip/installation-guide/anaconda#conda-installation)
### Step 1-2. Install Python
> Python 3.9 (2022-1)
Python is already installed by installing Anaconda. But, we will make a virtual environment for a specific Python version.
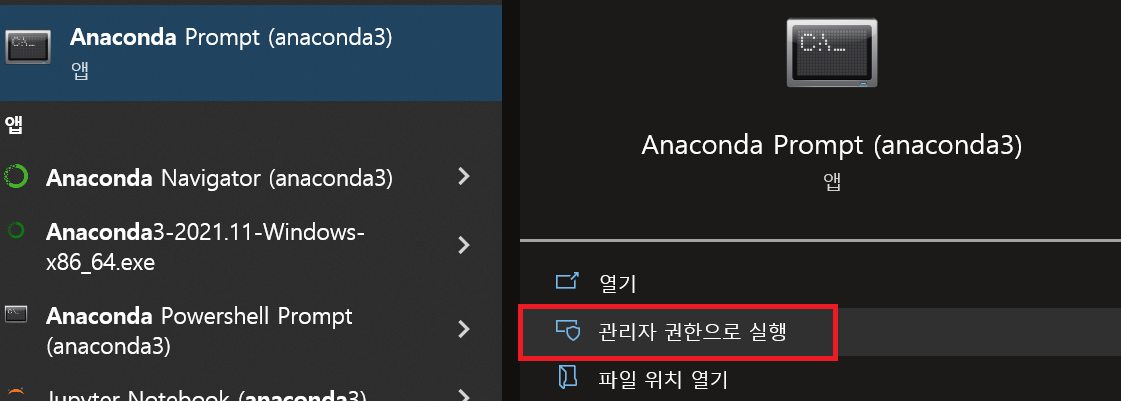
* Open Anaconda Prompt(admin mode)
* First, update conda
```bash
conda update -n base -c defaults conda
```

* Then, Create virtual environment for Python 3.9. Name the $ENV as `py39`. If you are in base, enter `conda activate py39`
```bash
conda create -n py39 python=3.9.12
```

* After installation, activate the newly created environment
```bash
conda activate py39
```

### Step 1-3. Install Libraries
#### Install Numpy, OpenCV, Matplot, Jupyter
```bash
conda activate py39
conda install -c anaconda seaborn jupyter
pip install opencv-python
```
## Part 2. Install Visual Studio Code
Follow: [How to Install VS Code](https://ykkim.gitbook.io/dlip/ide/vscode#installation)
Also, read about
* [How to program Python in VS Code](https://ykkim.gitbook.io/dlip/installation-guide/ide/vscode/python-vscode)
* [How to program CoLab(Notebook) in VS Code](https://ykkim.gitbook.io/dlip/installation-guide/ide/vscode/notebook-with-vscode)
***
## Part 3. Installing Graphic Card and CUDA
### Step 3-1. Install GPU Driver, CUDA, cuDNN
Skip this if you do not have GPU card.
**Nvidia GPU driver** **and Library** : To operate the GPU.
* **Graphic Driver** - Mandatory installation. Download from NVIDIA website
* **CUDA** — GPU library. Stands for *Compute Unified Device Architecture.*
* **cuDNN** — DL primitives library based on CUDA. Stands for *CUDA Deep Neural Network.*
Follow [How to install Driver, CUDA and cuDNN](https://ykkim.gitbook.io/dlip/installation-guide/cuda-installation)
***
## Part 4. Installing DL Framework
* **TensorFlow** — DL library, developed by Google.
* **Keras** — DL wrapper with interchangeable backends. Can be used with TensorFlow, Theano or CNTK.
* **PyTorch** — Dynamic DL library with GPU acceleration.
### Step 4-1. Install Pytorch
See here for install instructions of Previous PyTorch Versions [PyTorch Previous-Version](https://pytorch.org/get-started/previous-versions/)
**Without GPU(Only CPU)**
```bash
# CPU Only - PyTorch 2.1
conda install pytorch==2.1.1 torchvision==0.16.1 torchaudio==2.1.1 cpuonly -c pytorch
pip install opencv-python torchsummary
# CPU Only - PyTorch 1.9
conda install -c anaconda seaborn jupyter
conda install pytorch==1.9.1 torchvision==0.10.1 torchaudio==0.9.1 cpuonly -c pytorch
pip install opencv-python torchsummary
```
**With GPU** Change the PyTorch version depending on your CUDA version
For DLIP 2024
```bash
# CUDA 11.8
conda activate py39
conda install -c anaconda cudatoolkit=11.8 cudnn seaborn jupyter
conda install pytorch=2.1 torchvision torchaudio pytorch-cuda=11.8 -c pytorch -c nvidia
pip install opencv-python torchsummary
```
For DLIP 2022
```bash
# CUDA 10.2
conda install -c anaconda cudatoolkit==10.2.89 cudnn seaborn jupyter
conda install pytorch==1.9.1 torchvision==0.10.1 torchaudio==0.9.1 cudatoolkit=10.2 -c pytorch
pip install opencv-python torchsummary
```
Check the pytorch and torchvision are cuda versions when installing

**Check GPU in PyTorch**
```bash
conda activate py39
python
import torch
torch.__version__
print("cuda" if torch.cuda.is_available() else "cpu")
```
The result should be `cuda` as shown.

If your result is,
* `cuda` : GOOD, installed normally. You do not need to follow the steps below.
* `cpu` : Go to [Troubleshooting](#troubleshooting)
**Check Package Versions in Conda**
```bash
# check all lists
conda list
# check specific program version e.g. pyTorch
conda list | findstr "torch"
```
You can read more [about PyTorch installation](https://ykkim.gitbook.io/dlip/installation-guide/framework/pytorch)
### Step 4-2 Other Option (Tensorflow and Keras)
* Run 'Anaconda Prompt(admin)'
* Activate virtual environment
* install tensorflow-gpu 2.3.0 packages
* install keras
```bash
conda create -n py37tf23 python=3.7
conda activate py37tf23
conda install tensorflow-gpu=2.3.0
conda install keras
```
***
## Troubleshooting
### Q1. GPU not detected in PyTorch
#### SOLUTION 1) Type `conda list` in the `py39` environment
* check whether `cudatoolkit`, `cudnn` are installed
* check whether `pytorch` is the `cuda` version
* If it is not the same as the figure, re-install. else go to **SOLUTION 2**

#### SOLUTION 2) NVIDIA graphics driver update
If the NVIDIA graphics driver is not installed or if it is an older version, the GPU may not be detected. Please refer to the [How to install Driver, CUDA and cuDNN](https://ykkim.gitbook.io/dlip/cuda-installation#9f39) to install Graphic Driver.
### Q2. Conda error: Downloaded bytes did not match Content-Length
#### Solution
* Update Conda in Base: `conda update -n base -c defaults conda`
* Clean the conda cache in Base `conda clean --all`
* Activate Env: `conda activate py39`
* Update Packages: `conda update --all`
* Clean conda cache: `conda clean --all`
* Then, Install again
### Q3. Conda Error: ClobberError: This has incompatible packages due to a shared path, CondaVerification Error


#### Go to Solution of Q2
If this does not work, then you need to Re-Install the Conda Environment. Then, Update CONDA then create Environment again.
```bash
# $myenv = py39
# To keep the environment but remove all packages
conda remove -n myenv --all --keep-env
# To remove all enviromnent
conda remove --all
```
### Q4. Build Error in VS Code ( Numpy C-extension failed)

#### SOLUTION ) Default Profile Setting in CODE
`F1`키를 눌러 `select default profile`을 검색 후 클릭 → `command prompt`를 선택합니다.

---
# Agent Instructions: Querying This Documentation
If you need additional information that is not directly available in this page, you can query the documentation dynamically by asking a question.
Perform an HTTP GET request on the current page URL with the `ask` query parameter:
```
GET https://ykkim.gitbook.io/dlip/installation-guide/installation-guide-for-deep-learning.md?ask=
```
The question should be specific, self-contained, and written in natural language.
The response will contain a direct answer to the question and relevant excerpts and sources from the documentation.
Use this mechanism when the answer is not explicitly present in the current page, you need clarification or additional context, or you want to retrieve related documentation sections.