📚
DLIP
  • Introduction
  • Prerequisite
  • Image Processing Basics
    • Notes
      • Thresholding
      • Spatial Filtering
      • Masking with Bitwise Operation
      • Model n Calibration
    • Tutorial
      • Tutorial: Install OpenCV C++
      • Tutorial: Create OpenCV Project
      • Tutorial: C++ basics
      • Tutorial: OpenCV Basics
      • Tutorial: Image Watch for Debugging
      • Tutorial: Spatial Filter
      • Tutorial: Thresholding and Morphology
      • Tutorial: Camera Calibration
      • Tutorial: Color Image Processing
      • Tutorial: Edge Line Circle Detection
      • Tutorial: Corner Detection and Optical Flow
      • Tutorial: OpenCV C++ Cheatsheet
      • Tutorial: Installation for Py OpenCV
      • Tutorial: OpenCv (Python) Basics
    • LAB
      • Lab Report Template
      • Lab Report Grading Criteria
      • LAB Report Instruction
      • LAB: Grayscale Image Segmentation
        • LAB: Grayscale Image Segmentation -Gear
        • LAB: Grayscale Image Segmentation - Bolt and Nut
      • LAB: Color Image Segmentation
        • LAB: Facial Temperature Measurement with IR images
        • LAB: Magic Cloak
      • LAB: Straight Lane Detection and Departure Warning
      • LAB: Dimension Measurement with 2D camera
      • LAB: Tension Detection of Rolling Metal Sheet
  • Deep Learning for Perception
    • Notes
      • Lane Detection with Deep Learning
      • Overview of Deep Learning
        • Object Detection
        • Deep Learning Basics: Introduction
        • Deep Learning State of the Art
        • CNN, Object Detection
      • Perceptron
      • Activation Function
      • Optimization
      • Convolution
      • CNN Overview
      • Evaluation Metric
      • LossFunction Regularization
      • Bias vs Variance
      • BottleNeck Unit
      • Object Detection
      • DL Techniques
        • Technical Strategy by A.Ng
    • Tutorial - PyTorch
      • Tutorial: Install PyTorch
      • Tutorial: Python Numpy
      • Tutorial: PyTorch Tutorial List
      • Tutorial: PyTorch Example Code
      • Tutorial: Tensorboard in Pytorch
      • Tutorial: YOLO in PyTorch
        • Tutorial: Yolov8 in PyTorch
        • Tutorial: Train Yolo v8 with custom dataset
          • Tutorial: Train Yolo v5 with custom dataset
        • Tutorial: Yolov5 in Pytorch (VS code)
        • Tutorial: Yolov3 in Keras
    • LAB
      • Assignment: CNN Classification
      • Assignment: Object Detection
      • LAB: CNN Object Detection 1
      • LAB: CNN Object Detection 2
      • LAB Grading Criteria
    • Tutorial- Keras
      • Train Dataset
      • Train custom dataset
      • Test model
      • LeNet-5 Tutorial
      • AlexNet Tutorial
      • VGG Tutorial
      • ResNet Tutorial
    • Resource
      • Online Lecture
      • Programming tutorial
      • Books
      • Hardware
      • Dataset
      • Useful sites
  • Must Read Papers
    • AlexNet
    • VGG
    • ResNet
    • R-CNN, Fast-RCNN, Faster-RCNN
    • YOLOv1-3
    • Inception
    • MobileNet
    • SSD
    • ShuffleNet
    • Recent Methods
  • DLIP Project
    • Report Template
    • DLIP 2021 Projects
      • Digital Door Lock Control with Face Recognition
      • People Counting with YOLOv4 and DeepSORT
      • Eye Blinking Detection Alarm
      • Helmet-Detection Using YOLO-V5
      • Mask Detection using YOLOv5
      • Parking Space Management
      • Vehicle, Pedestrian Detection with IR Image
      • Drum Playing Detection
      • Turtle neck measurement program using OpenPose
    • DLIP 2022 Projects
      • BakeryCashier
      • Virtual Mouse
      • Sudoku Program with Hand gesture
      • Exercise Posture Assistance System
      • People Counting Embedded System
      • Turtle neck measurement program using OpenPose
    • DLIP Past Projects
  • Installation Guide
    • Installation Guide for Pytorch
      • Installation Guide 2021
    • Anaconda
    • CUDA cuDNN
      • CUDA 10.2
    • OpenCV
      • OpenCV Install and Setup
        • OpenCV 3.4.13 with VS2019
        • OpenCV3.4.7 VS2017
        • MacOS OpenCV C++ in XCode
      • Python OpenCV
      • MATLAB-OpenCV
    • Framework
      • Keras
      • TensorFlow
        • Cheat Sheet
        • Tutorial
      • PyTorch
    • IDE
      • Visual Studio Community
      • Google Codelab
      • Visual Studio Code
        • Python with VS Code
        • Notebook with VS Code
        • C++ with VS Code
      • Jupyter Notebook
        • Install
        • How to use
    • Ubuntu
      • Ubuntu 18.04 Installation
      • Ubuntu Installation using Docker in Win10
      • Ubuntu Troubleshooting
    • ROS
  • Programming
    • Python_Numpy
      • Python Tutorial - Tips
      • Python Tutorial - For Loop
      • Python Tutorial - List Tuple, Dic, Set
    • Markdown
      • Example: API documentation
    • Github
      • Create account
      • Tutorial: Github basic
      • Tutorial: Github Desktop
    • Keras
      • Tutorial Keras
      • Cheat Sheet
    • PyTorch
      • Cheat Sheet
      • Autograd in PyTorch
      • Simple ConvNet
      • MNIST using LeNet
      • Train ConvNet using CIFAR10
  • Resources
    • Useful Resources
    • Github
Powered by GitBook
On this page
  • I. Introduction
  • II. Tutorial
  • Part 1. Corner Detection
  • Part 2. Optical Flow: Lukas Kanade Optical Flow with pyramids

Was this helpful?

  1. Image Processing Basics
  2. Tutorial

Tutorial: Corner Detection and Optical Flow

PreviousTutorial: Edge Line Circle DetectionNextTutorial: OpenCV C++ Cheatsheet

Last updated 1 year ago

Was this helpful?

I. Introduction

In this tutorial, you will learn how to find corners to track an object using OopenCV. To detect corners, Harris corner detection method will be used. To track an object, optical flow tracking method (Lukas-Kanade-Tomasi) will be used.

II. Tutorial

Download Test Image Files:

Part 1. Corner Detection

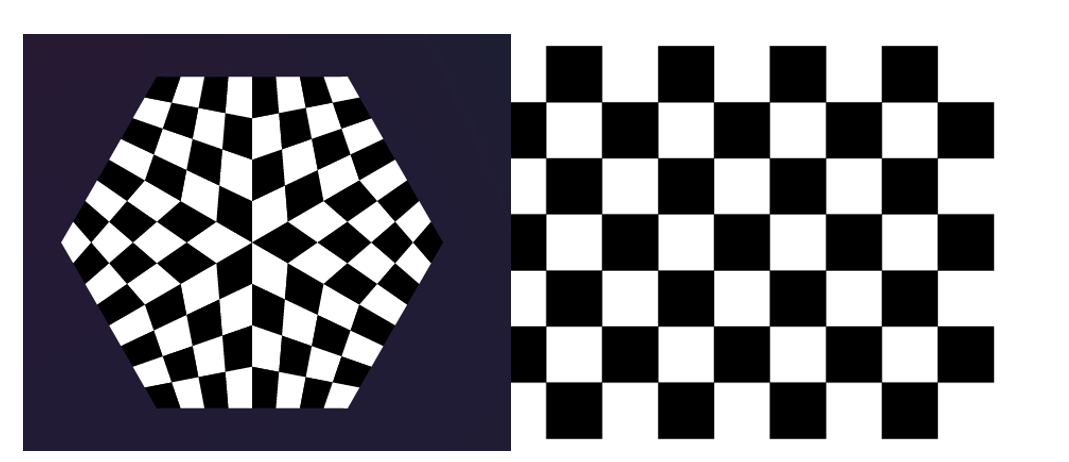
We will learn how to use Harris Corner Detection to find corners, which is an important algorithm for the camera calibration that requires to find chessboard corners.

  • OpenCV function of Harris corner detection:

// C++: 
      
    
void cv::cornerHarris	(	InputArray 	src,
							OutputArray 	dst,
							int 	blockSize,
							int 	ksize,
							double 	k,
							int 	borderType = BORDER_DEFAULT 
)	

Harris corner detector.

The function runs the Harris corner detector on the image. Similarly to cornerMinEigenVal and cornerEigenValsAndVecs , for each pixel (x,y) it calculates a 2×2 gradient covariance matrix M(x,y) over a blockSize×blockSize neighborhood. Then, it computes the following characteristic:

dst(x,y)=detM(x,y)−k⋅(trM(x,y))2

Corners in the image can be found as the local maxima of this response map.

Parameters:

· src – Input single-channel 8-bit or floating-point image.

· dst – Image to store the Harris detector responses. It has the type CV_32FC1 and the same size as src .

· blockSize – Neighborhood size (see the details on [cornerEigenValsAndVecs()](http://docs.opencv.org/2.4/modules/imgproc/doc/feature_detection.html?highlight=cornerharris#void cornerEigenValsAndVecs(InputArray src, OutputArray dst, int blockSize, int ksize, int borderType)) ).

· ksize – Aperture parameter for the [Sobel()](http://docs.opencv.org/2.4/modules/imgproc/doc/filtering.html#void Sobel(InputArray src, OutputArray dst, int ddepth, int dx, int dy, int ksize, double scale, double delta, int borderType)) operator.

· k – Harris detector free parameter. See the formula below.

· borderType – Pixel extrapolation method. See [borderInterpolate()](http://docs.opencv.org/2.4/modules/imgproc/doc/filtering.html#int borderInterpolate(int p, int len, int borderType)) .

Tutorial Code:

#include "opencv2/highgui.hpp"
#include "opencv2/imgproc.hpp"
#include <iostream>
using namespace cv;
using namespace std;
Mat src, src_gray;
int thresh = 200;
int max_thresh = 255;
const char* source_window = "Source image";
const char* corners_window = "Corners detected";
void cornerHarris_demo( int, void* );
int main( int argc, char** argv )
{
    src = imread("../../../Image/checkedPattern.png", 1);
    if ( src.empty() )
    {
        cout << "Could not open or find the image!\n" << endl;
        cout << "Usage: " << argv[0] << " <Input image>" << endl;
        return -1;
    }
    cvtColor( src, src_gray, COLOR_BGR2GRAY );
    namedWindow( source_window );
    createTrackbar( "Threshold: ", source_window, &thresh, max_thresh, cornerHarris_demo );
    imshow( source_window, src );
    cornerHarris_demo( 0, 0 );
    waitKey();
    return 0;
}
void cornerHarris_demo( int, void* )
{
    int blockSize = 2;
    int apertureSize = 3;
    double k = 0.04;
    Mat dst = Mat::zeros( src.size(), CV_32FC1 );
    cornerHarris( src_gray, dst, blockSize, apertureSize, k );
    Mat dst_norm, dst_norm_scaled;
    normalize( dst, dst_norm, 0, 255, NORM_MINMAX, CV_32FC1, Mat() );
    convertScaleAbs( dst_norm, dst_norm_scaled );
    for( int i = 0; i < dst_norm.rows ; i++ )
    {
        for( int j = 0; j < dst_norm.cols; j++ )
        {
            if( (int) dst_norm.at<float>(i,j) > thresh )
            {
                circle( dst_norm_scaled, Point(j,i), 5,  Scalar(0), 2, 8, 0 );
            }
        }
    }
    namedWindow( corners_window );
    imshow( corners_window, dst_norm_scaled );
}

Part 2. Optical Flow: Lukas Kanade Optical Flow with pyramids

// C++: 


void cv::calcOpticalFlowPyrLK	(	InputArray 	prevImg,
                                    InputArray 	nextImg,
                                    InputArray 	prevPts,
                                    InputOutputArray 	nextPts,
                                    OutputArray 	status,
                                    OutputArray 	err,
                                    Size 	winSize = Size(21, 21),
                                    int 	maxLevel = 3,
                                    TermCriteria 	criteria = TermCriteria(TermCriteria::COUNT+TermCriteria::EPS, 30, 0.01),
                                    int 	flags = 0,
                                    double 	minEigThreshold = 1e-4 
)		

Calculates an optical flow for a sparse feature set using the iterative Lucas-Kanade method with pyramids.

Tutorial
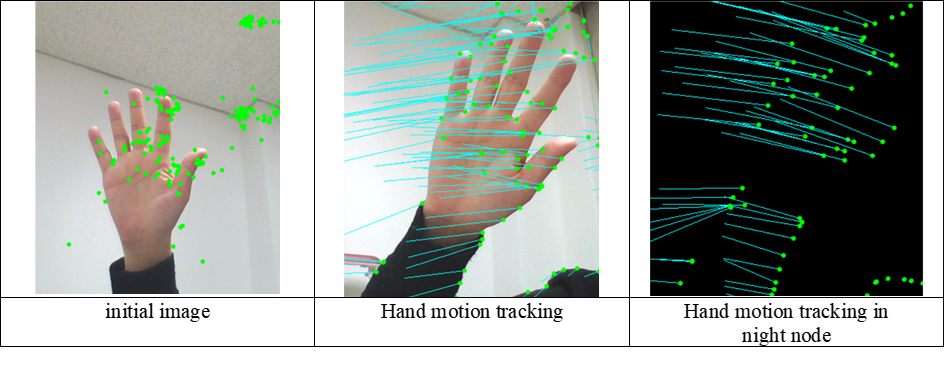
  1. Declare variables for Optical flow functions such as the previous and current images(gray scaled), point vectors and term criteria

// Optical flow control parameters
	const int MAX_COUNT = 500;
	bool needToInit = false;
	bool nightMode = false;
	TermCriteria termcrit(TermCriteria::COUNT | TermCriteria::EPS, 20, 0.03);
	Size subPixWinSize(10, 10), winSize(31, 31);
	vector<Point2f> points[2], initialP;
	vector<uchar> status;
	vector<float> err;
			
	Mat gray, prevGray;
	bool bInitialize = true;
  1. Read the current video image and convert to gray scaled image

cap >> frame;
frame.copyTo(image);
cvtColor(image, gray, COLOR_BGR2GRAY);

​

  1. First, initialize the reference features to track. Initialization is run only once, unless the user calls this function again.

// Finding initial feature points to track 
		if (bInitialize)
		{
			goodFeaturesToTrack(gray, points[0], MAX_COUNT, 0.01, 10, Mat(), 3, 0, 0.04);
			cornerSubPix(gray, points[0], subPixWinSize, Size(-1, -1), termcrit);
			initialP = points[0];
			gray.copyTo(prevGray);
			bInitialize = false;
		}
  1. Run Optical flow and save the results on the current image (gray, points[1])

// run  optic flow 
	calcOpticalFlowPyrLK(prevGray, gray, points[0], points[1], status, err, winSize,3, termcrit, 0, 0.001);
  1. Draw found features and draw lines

// draw tracked features on the image
		for (int i = 0; i < points[1].size(); i++)
		{				
			
			//line(image, points[0][i], points[1][i], Scalar(255, 255, 0));
			line(image, initialP[i], points[1][i], Scalar(255, 255, 0));
			circle(image, points[1][i], 3, Scalar(0, 255, 0), -1, 8);
		}
  1. Swap current results to the next previous image/points

		// Save current values as the new prev values
		std::swap(points[1], points[0]);
		cv::swap(prevGray, gray);
  1. Show the result image

		namedWindow("LK Demo", 1);
imshow("LK Demo", image);
// Machine VIsion - YKKim 2016.11
// OpticalFlow_Demo.cpp 
// Optical flow demonstration
// Modification of OpenCV tutorial code


#include "opencv.hpp" 
#include "opencv2/video/tracking.hpp"
#include <iostream>
#include <ctype.h>

using namespace cv;
using namespace std;

#define MOVIE	0
#define CAM		1
#define IMAGE	0


void printHelp()
{
	
	cout << "\n A simple Demo of Lukas-Kanade optical flow ,\n"
		"Using OpenCV version " << CV_VERSION << endl;
	cout << "\tESC - quit the program\n"
		"\tr - auto-initialize tracking\n"
		"\tc - delete all the points\n"
		"\tn - switch the \"night\" mode on/off\n" << endl;
}


int main()
{
	printHelp();
	Mat image;
		
	#if MOVIE	
		VideoCapture cap;
		Mat frame;
		cap.open("road1.mp4");
		if (!cap.isOpened()){
			cout << " Video not read \n";
			return 1;
		}
		//int rate=cap.get(CV_CAP_PROP_FPS);
		cap.read(frame);
	#endif MOVIE

	#if CAM
		VideoCapture cap;
		Mat frame;
		//VideoCapture capture;	
		cap.open(0);
		if (!cap.isOpened())
		{

			cout << "***Could not initialize capturing...***\n";
			cout << "Current parameter's value: \n";

			return -1;
		}
		cout << "Camera Read OK \n";
		cap >> frame;  // Read from cam

	#endif CAM

	#if IMAGE
		image = imread("Traffic1.jpg");	
	#endif IMAGE
	
	// Optical flow control parameters
	const int MAX_COUNT = 500;
	bool needToInit = false;
	bool nightMode = false;
	TermCriteria termcrit(TermCriteria::COUNT | TermCriteria::EPS, 20, 0.03);
	Size subPixWinSize(10, 10), winSize(31, 31);
	vector<Point2f> points[2], initialP;
	vector<uchar> status;
	vector<float> err;
			
	Mat gray, prevGray;
	bool bInitialize = true;
	
	for (;;)
	{
		
		#if CAM | MOVIE
			cap >> frame;
			if (frame.empty())
				break;
			frame.copyTo(image);
		#endif CAM

		cvtColor(image, gray, COLOR_BGR2GRAY);
		
		// Finding initial feature points to track 
		if (bInitialize)
		{
			goodFeaturesToTrack(gray, points[0], MAX_COUNT, 0.01, 10); // , Mat(), 3, 0, 0.04);
			cornerSubPix(gray, points[0], subPixWinSize, Size(-1, -1), termcrit);
			initialP = points[0];
			gray.copyTo(prevGray);
			bInitialize = false;
		}

		if (nightMode)
			image = Scalar::all(0);

		
		// run  optic flow 
		calcOpticalFlowPyrLK(prevGray, gray, points[0], points[1], status, err, winSize,
			3, termcrit, 0, 0.001);

		// draw tracked features on the image
		for (int i = 0; i < points[1].size(); i++)
		{				
			
			//line(image, points[0][i], points[1][i], Scalar(255, 255, 0));
			line(image, initialP[i], points[1][i], Scalar(255, 255, 0));
			circle(image, points[1][i], 3, Scalar(0, 255, 0), -1, 8);
		}

		// Save current values as the new prev values
		std::swap(points[1], points[0]);
		cv::swap(prevGray, gray);

		
		namedWindow("LK Demo", 1);
		imshow("LK Demo", image);

		char c = (char)waitKey(10);
		if (c == 27)
			break;
		switch (c)
		{
		case 'r':
			bInitialize = true;
			break;
		case 'c':
			points[0].clear();
			points[1].clear();
			bInitialize = true;
			break;
		case 'n':
			nightMode = !nightMode;
			break;
		}
	}

	return 0;
}

OpenCV function of Harris corner detection:

Tutorial Code:

read docs
see code here
Image data click here
read docs