OpenCV 3.4.13 with VS2019
Installing OpenCV 3.4.13 with Visual Studio 2019
OpenCV Download link: https://opencv.org/releases/

Opencv 설치 파일 다운로드 >> 설치 파일 압축풀기
C:\ opencv-3.4.13 폴더 새롭게 생성 >> 아래 그림과 같이 설치파일 복사
C:\ opencv-3.4.13 \build, C:\ opencv-3.4.13 \sources\

PATH 환경설정
제어판> 시스템 및 보안 > 시스템 > 고급 시스템 설정 – 고급 탭 > 환경변수(N) 클릭

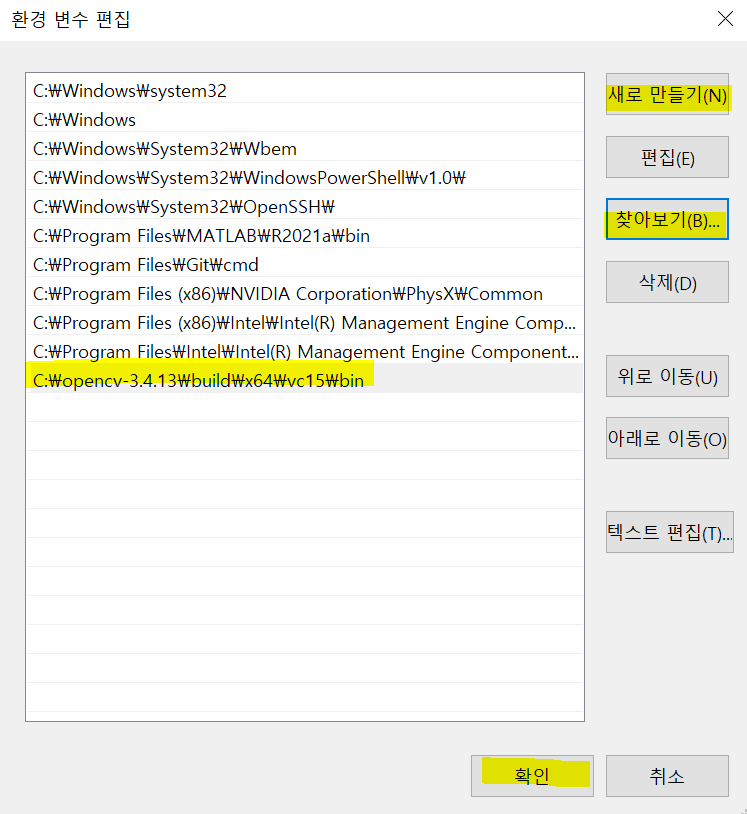
‘시스템 변수’ 항목에 있는 변수 명 중 ‘**Path’**를 찾아 편집
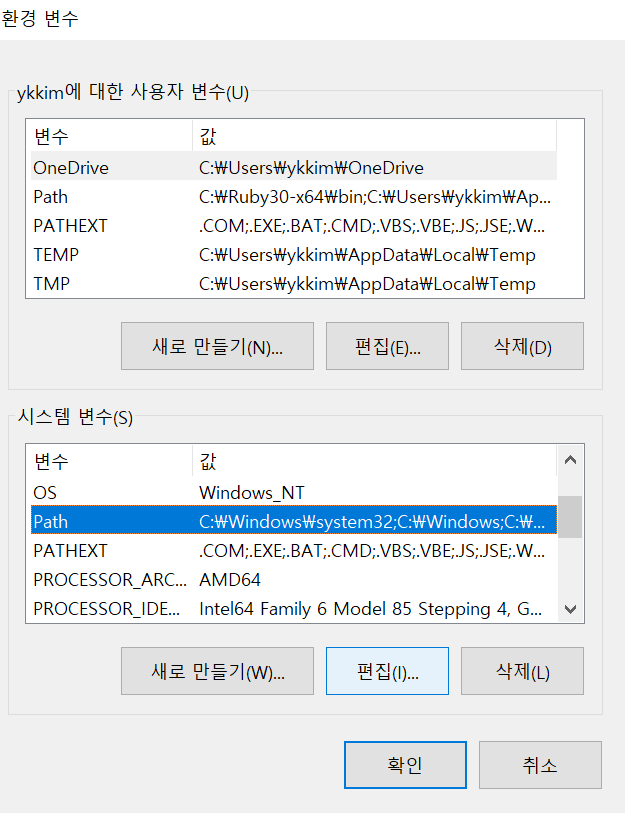

새로 만들기 > 찾아보기 > C:\opencv-3.4.13\build\x64\vc15\bin 선택
OpenCV dll 파일 경로 설정과정임
Path 설정 완료되면 컴퓨터 재부팅
OpenCV 프로젝트 속성시트(Property sheet)만들기
Visual Studio 201x 실행 후
방법 1) 새 프로젝트 만들기 > 빈 프로젝트
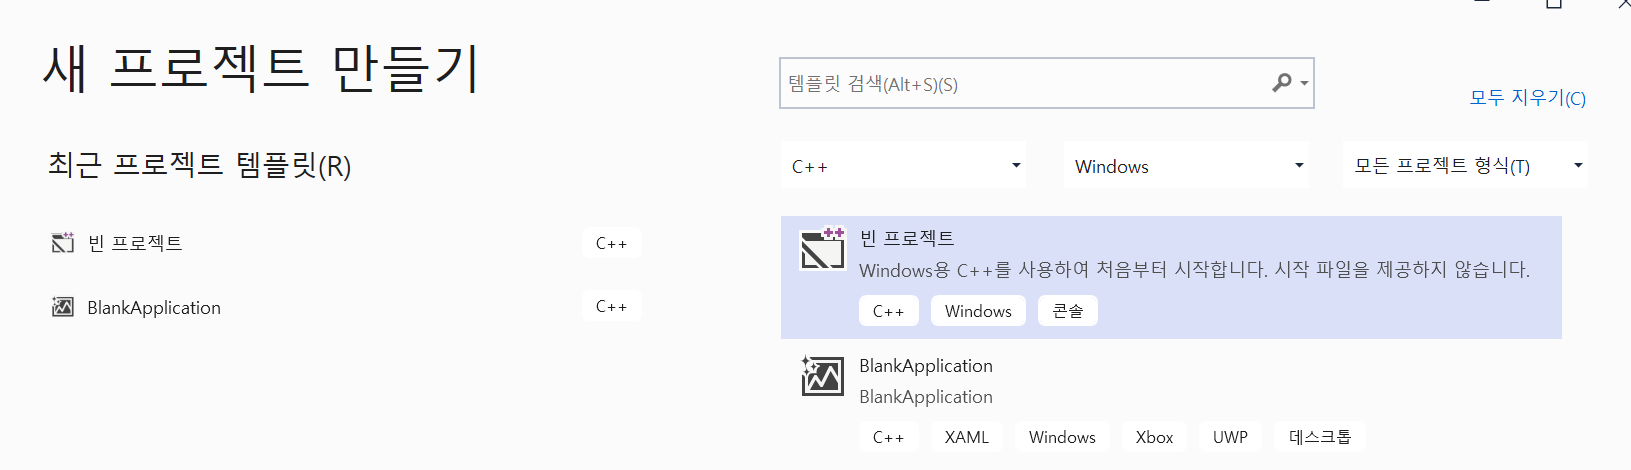
방법 2) 파일> 새로 만들기> 프로젝트 선택
**빈 프로젝트: 프로젝트 이름 ** OpenCVprop 입력 > 만들기

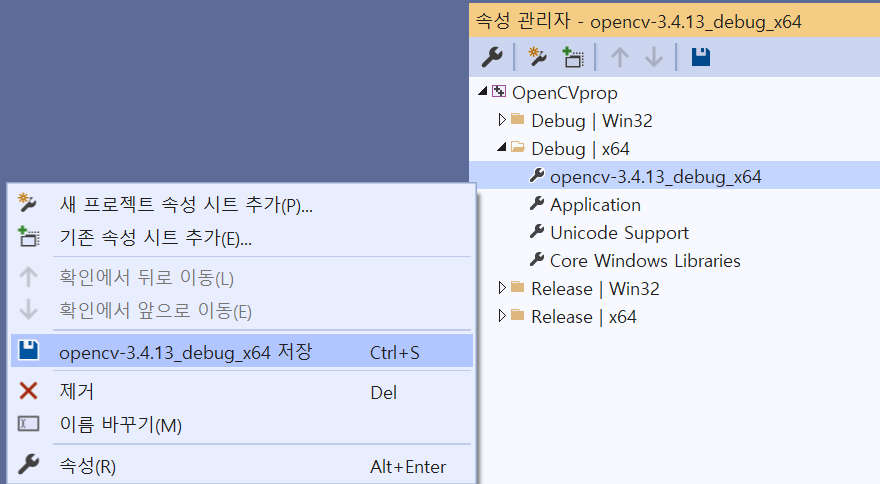
Debug x64 Property Sheet 만들기
메뉴: 보기>다른 창>속성 관리자 선택
속성 관리자 창 > OpenCVprop > Debug|x64 위에 RightClick.
**새 프로젝트 속성 시트 추가 > 이름 **: opencv-3.4.13_debug_x64.props 으로 지정 > 추가
반드시 이름에 .props까지 기재할 것
Debug | x64 에서 설정.


**속성관리자 창: ** Debug | x64 > opencv-3.4.13_debug_x64 double click

[Opencv 헤더 (include) 디렉터리 추가]
공용 속성 > C/C++ > 일반 > 추가 포함 디렉터리 > 편집
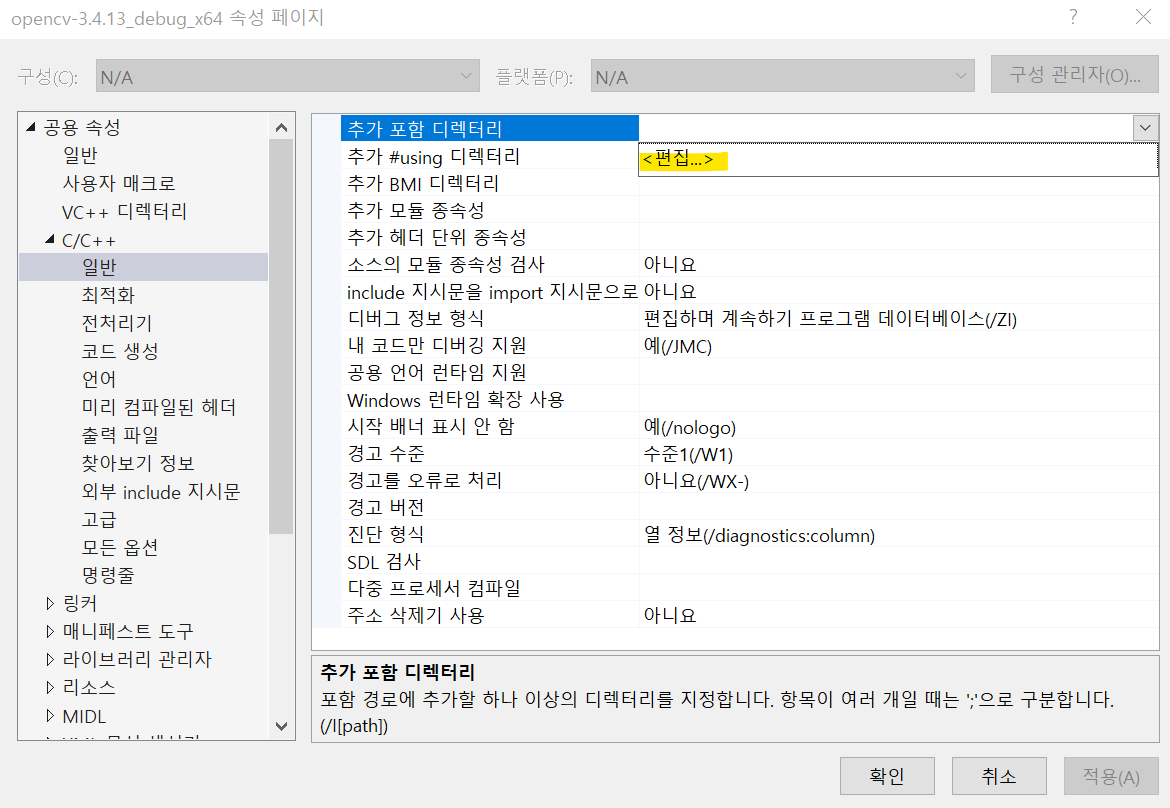
> 추가 포함 디렉터리> 줄추가 : 아래 경로들을 순서에 맞게 추가 > 확인
C:\opencv-3.4.13\build\include
C:\opencv-3.4.13\build\include\opencv
C:\opencv-3.4.13\build\include\opencv2

[ OpenCV lib 디렉터리 추가]
공용 속성 > 링커 > 일반 > 추가 라이브러리 디렉터리 > 편집 > 추가 라이브러리 디렉터리
C:\opencv-3.4.13\build\x64\vc15\lib추가
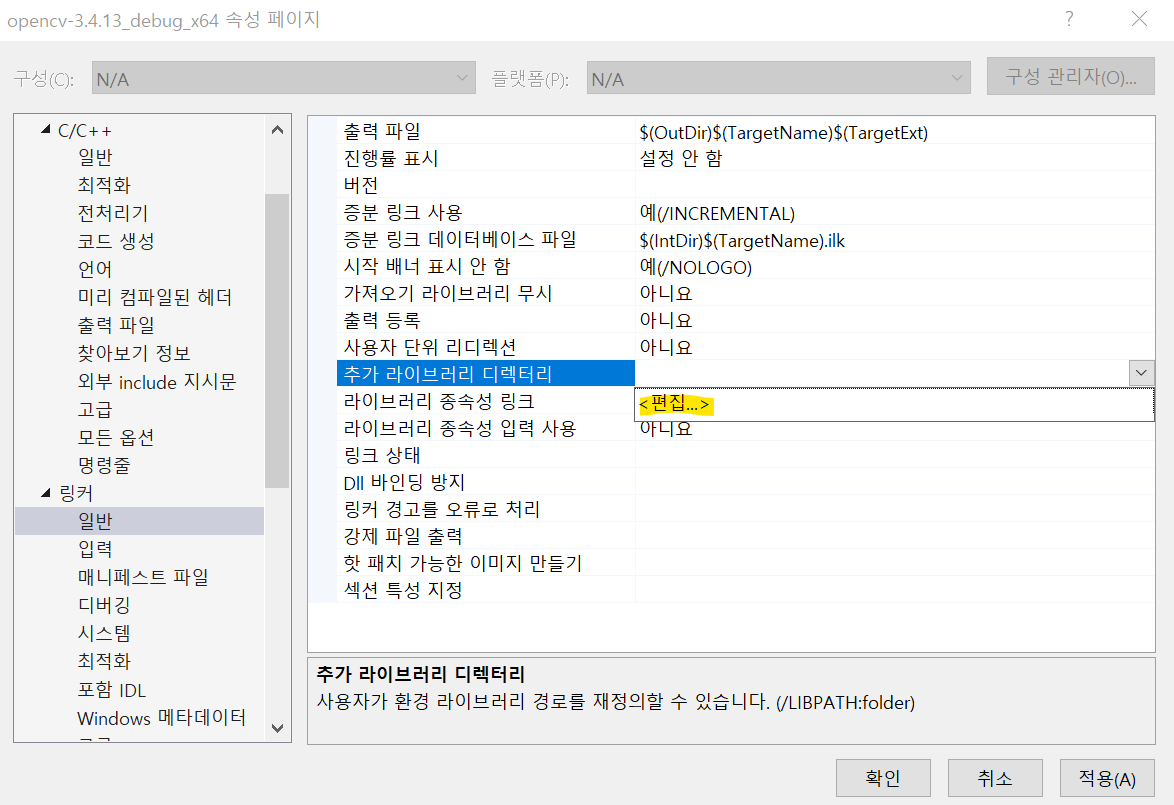

[ OpenCV lib 파일 추가]
공용 속성> 링커 > 입력 > 추가 종속성> 편집
opencv_world3413d.lib경로 추가
debug 모드에서는 'd' (xxx3413d.lib) 로 표시된 파일을 추가


(중요)
위 설정 완료 후 반드시 opencv-3.4.13_debug_x64 저장
Release x64 Property Sheet 만들기
속성 관리자 창 > OpenCVprop > Release|x64 : RightClick.
새 프로젝트 속성 시트 추가 > 이름: opencv-3.4.13_release_x64.props으로 지정 후 추가

위에 설명한 Debug x64 Property Sheet 만들기 과정과 유사하며, 아래 경로를 추가하여 반복
공용 속성 > C/C++ > 일반 > 추가 포함 디렉터리 > 경로추가
C:\opencv-3.4.13\build\include
C:\opencv-3.4.13\build\include\opencv
C:\opencv-3.4.13\build\include\opencv2
공용 속성 > 링커 > 일반 > 추가 라이브러리 디렉터리 > 경로 추가
C:\opencv-3.4.13\build\x64\vc15\lib
공용 속성> 링커 > 입력 > 추가 종속성> 경로추가
opencv_world3413.lib
release에서는 'opencv_world3413.lib' 로 해야함. ('***d.lib)는 아님!!. ', debug 에서만 'opencv_world3413d.lib' 로 설정해야 함
(중요)
위 설정 완료 후 반드시 opencv-3.4.13_release_x64 저장
OpenCV VS프로젝트 만들기
Visual Studio 2019 실행 후 '파일> 새로 만들기> 프로젝트 선택
Visual C++ > 빈 프로젝트 : 프로젝트 이름 opencv_simple_demo 입력 후 만들기
Project Property Sheet 설정
메뉴>보기>다른 창>속성 관리자 선택
속성 관리자 창 > 프로젝트명 > Debugx64 : RightClick.
'기존 속성 시트 추가' 선택 후 앞에서 저장된 Property Sheet " opencv-3.4.13_debug_x64.props " 를 추가
동일한 과정 Release|x64 항목에서 Property Sheet " opencv-3.4.13_release_x64.props " 를 추가


소스파일 만들기
보기 – 솔루션탐색기 > [프로젝트] > 소스 파일 > 추가 > 새항목 click
C++파일(cpp) 선택 후 opencv_simple_demo.cpp 생성


구성 관리자를 Debug x64로 설정 후 아래 코드를 입력.
디버깅하지 않고 시작 (CTRL+F5)

Demo 코드 1: Image File Read
이미지 파일 다운로드: Click here
이미지 파일과 소스코드가 동일 폴더에 있어야 함!!
Expected Output

Demo 코드 2: Camera Open and capture
Expected Output

Last updated