Because of increasing usage of smartphones and computers, forward head posture is severe in modern young people. But actually by correcting their posture, it can be easily cured. And if you know your current posture, it is naturally followed by correcting posture. So we designed this program to visualize subject's posture by using OpenPose. OpenPose works best at Nvidia GPU environment.
1. Download OpenPose
Download OpenPose ZIP file below.(openpose-master.zip)
Extract ZIP file in your directory. And start 'getModels.bat' in your directory.
After download is done, you'll have .caffemodel file in each model folder. Copy and paste both .prototxt and .caffemodel files in your directory.
After this your workplace will be look like this.
2. VS Code
You need py39, you must check this.
Module Import
Load OpenPose Model
Visualize the Results
Result
(a) Trutle Neck
(b) Straight Neck
(c) Near Turtle
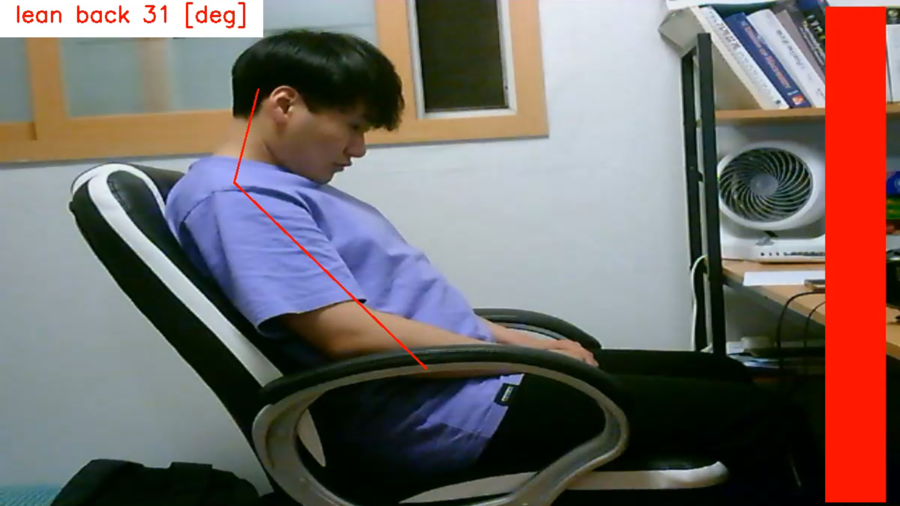
(d) Lean Back
Discussion
OpenPose is very heavy program, so it works very slow. Due to the low fps, output shows slightly obsolete results. And OpenPose requires the position of waist, the camera must be set in exact height and distant. The distance is about 1.5m and the height is about 1m, which will lead to inconvenience for use. We need to improve these problems.