Arduino WiFi
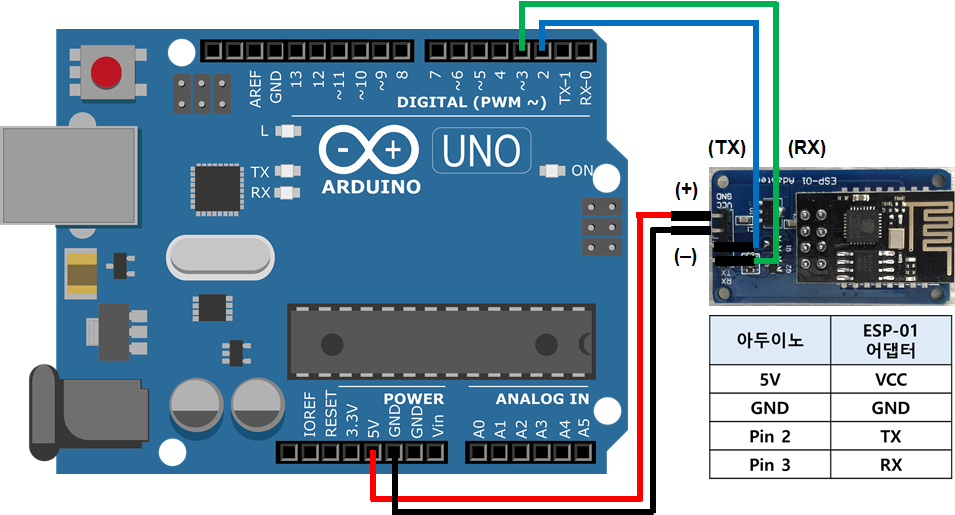
Add WiFi(ESP8266) to Arduino UNO

Arduino sketch code

Reference

Last updated
Last updated
#include <SoftwareSerial.h>

SoftwareSerial ESPserial(2, 3); // RX | TX

void setup()

{

//Serial.begin(115200); // communication with the host computer
Serial.begin(9600); // communication with the host computer

//while (!Serial) { ; }

// Start the software serial for communication with the ESP8266

ESPserial.begin(115200);
//ESPserial.begin(9600); // communication with the host computer

Serial.println("");

Serial.println("Remember to to set Both NL & CR in the serial monitor.");

Serial.println("Ready");

Serial.println("");

}

void loop()

{

// listen for communication from the ESP8266 and then write it to the serial monitor

if ( ESPserial.available() ) {
  //Serial.println("received");
  Serial.write( ESPserial.read() ); }

// listen for user input and send it to the ESP8266

if ( Serial.available() ) {
  //Serial.println("read");
  ESPserial.write( Serial.read() ); }

}AT // should get OK response
AT+UART_DEF=9600,8,1,0,0 // to change UNO-ESP baudrate to 9600*AT+CWMODE? // Current Connection Mode
AT+CWMODE=1 // Change Connection Mode to Mode=1 (Station mode)
AT+CWLAP // Show List of Avaiable WiFi
AT+CWJAP="SSID","비밀번호" // Connect with SSID and Password
AT+CIFSR // Check IP and MAC