Tutorial: arduino-stm32 Part1
Preparation
MCU board: Nucleo-F401RE
GPIO Digital In/Out
We are going to create a simple program that turns LED(LD2) on and off by pressing the user button(BT1).
Configures the specified pin to behave either as an input or an output.
pinMode(pin, mode)pin: the pin number to set the model of.
mode: INPUT, OUTPUT or INPUT_PULLUP.
Look up for pinMode() function in arduino reference for detail description.
Example
Create a new program named as ‘TU_arduino_GPIO_LED_button’.
Write the following source code: source code.
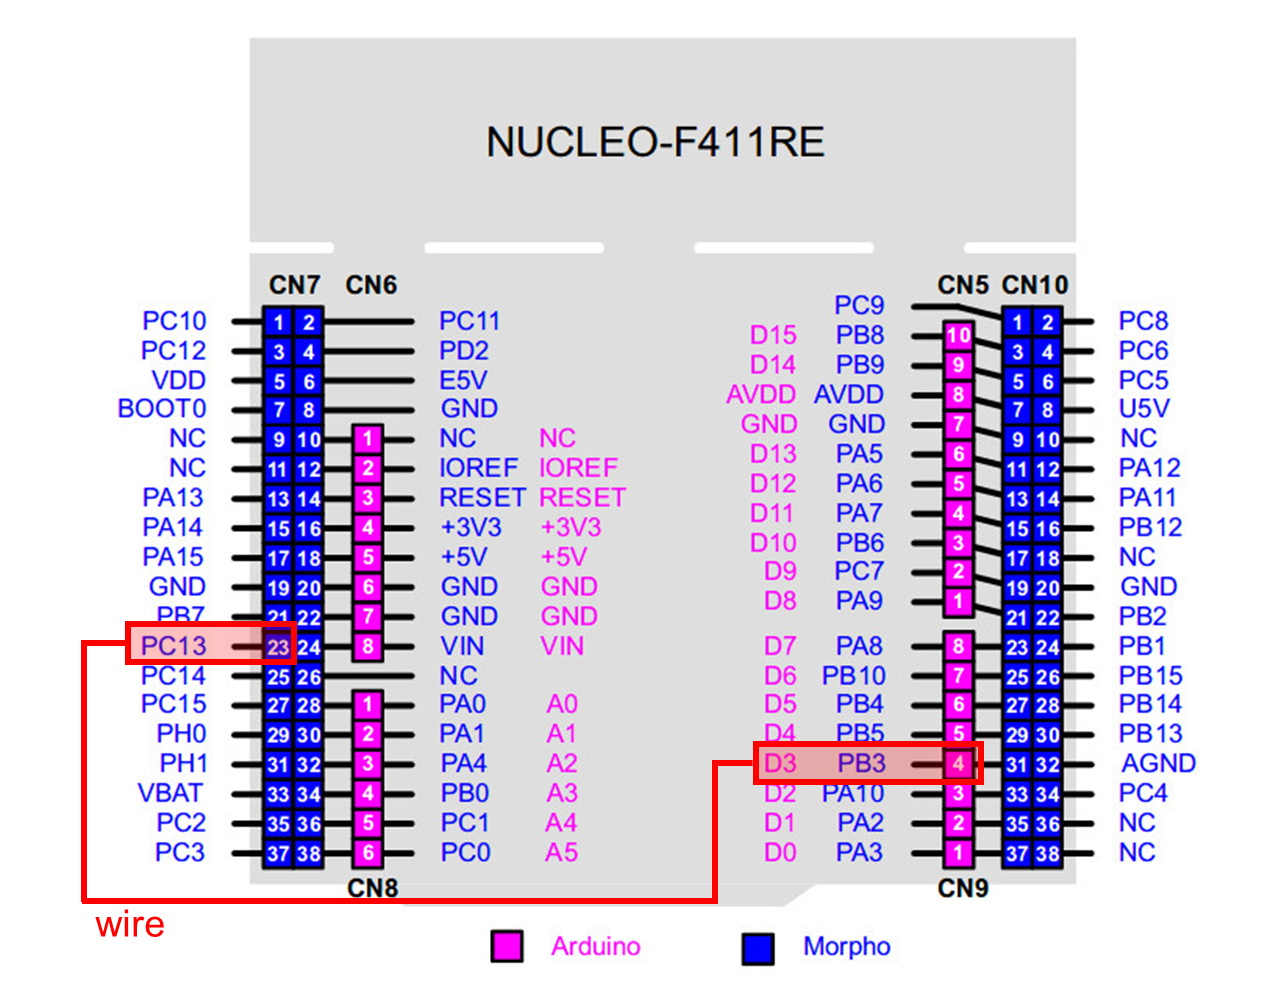
The user button pin is PC13, but this pin cannot be used in arduino. So, you should connect PC13 to pinName D3 by using wire.

Click on upload button. Push the reset button(black) and check the performance. The LED(LD2) should be turned on when the button is pressed.
External Interrupt
We are going to create a simple program that turns LED(LD2) on triggered by External Interrupt of user button(BT1).
digitalPinToInterrupt(pin): translate the digital pin to the specific interrupt number.
ISR: a function called whenever the interrupt occurs.
mode: defines when the interrupt should be trggered. (LOW, CHANGE, RISING, FALLING)
Example
Create new program as ‘TU_arduino_ExtIn’.
Write the following code.
Click on upload button.
Whenever the user button(BT1) is pressed (at fall), then the LED should be ON. When the button is released then the LED should be off.
Exercise
Motion Detection Exercise
Use External interrupt to get the digital in data from the motion sensor
When the userbutton is pressed, it should turn-off the LED.
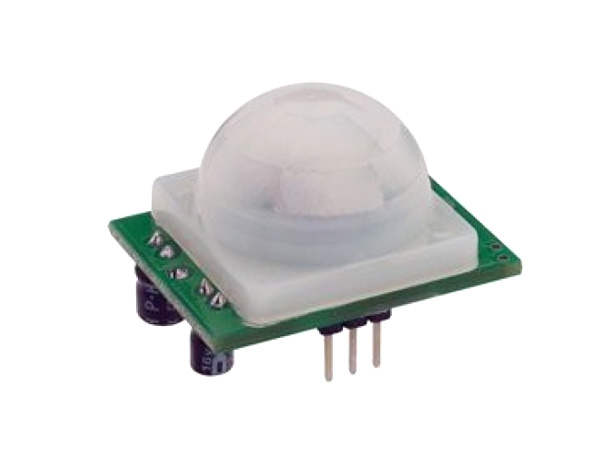
The experiment kit has IR motion sensor(HD-SEN0018) that detects a motion of an object nearby. It is often used in automatic lighting system at the front door. It is connected to PinName D5 as DigitalIn.

Ticker (SysTick interrupt)
We are going to create a simple program that uses System Timer Tick Interrupt that occurs periodically. Lets turn LED on and off at 1 sec of period.
Add STM32Timer Interrupt Library
Download the library as lastest version.
Add the library as .zip file.
On the menu bar, select sketch > Include Library > Add .ZIP Library. Then, open 'STM32_TimerInterrupt-(version).zip'.
STM32Timer class
STM32Timer
TIMx : Timer number (TIM1, TIM2, ...)
period_us : Period of Timer (unit: microseconds)
TimerHandler : a function handling the timers run
STM32_ISR_Timer
period_ms : Period of ISR Timer (unit: miliseconds)
timerInterrupt : a function excuted whenever the period of ISR Timer.
Use the STM32TimerInterrupt interface to set up a recurring interrupt; it calls a function repeatedly and at a specified rate.
Example
Create a new program named as ‘TU_arduino_TimerInterrupt’.
You can make LED blink every second, even though there is no infinite loop. This is also called as the ‘Timer interrupt’ or ‘SysTick interrupt’.
Click on Upload button.
LED(LD2) should blink every second.
Exercise
Buzz output exercise
Buzz the sound for about 1 second that repeats for every 3 seconds.
e.g: 1 sec of buzzing then 2 secs of silence and repeat
This experiment kit has a digital buzzer (MCKPI-G1410).
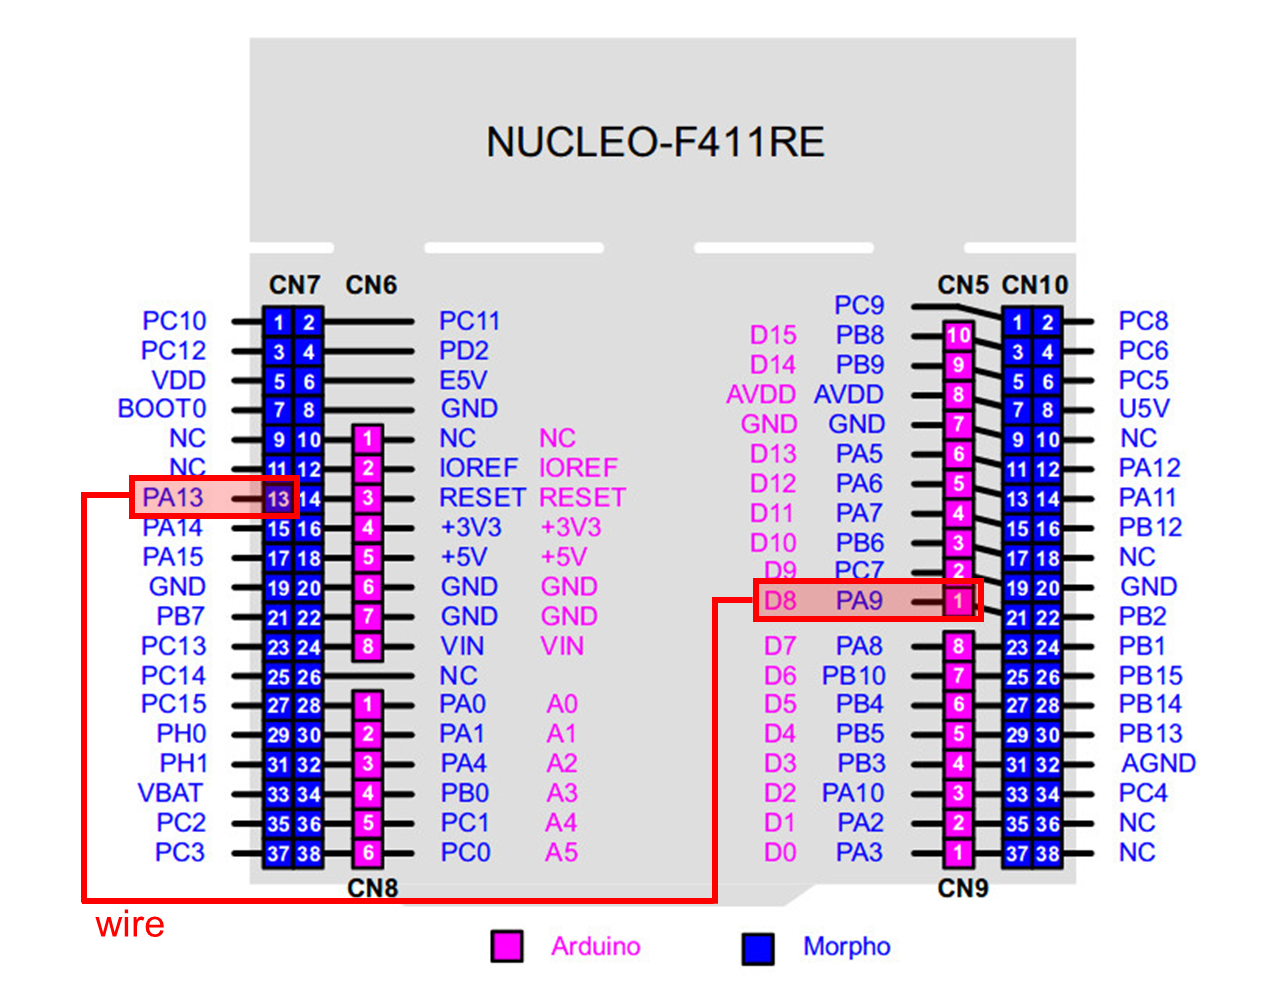
It is connected at DigitalOut PA13. (But, you should wire PA13 to pinName D8.)
A simple example of using a buzzer:

Last updated