Tutorial: Repository Management
Last updated
Last updated
C:\Users\(user_name)\source\repos
This is the local folder where you do your tutorial, lab.
Create a folder named as "EC" in "C:\users(user_name)\source\repos".
Create 3 folders named as "Tutorial", "LAB" and "lib" in "EC" folder.
Tutorial / LAB : includes the project files.
lib : includes header files.
Create a new folder in "LAB" or "Tutorial".
named as "LAB_(title)" or "TU_(title)"
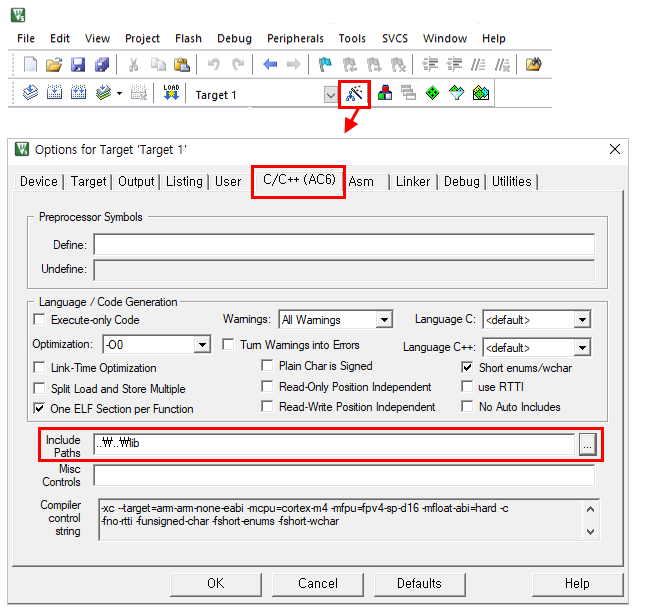
Create a new project and set for embedded board. Tutorial: Create a project with uVision
Then, set "Include Paths" as "C:\users(user_name)\source\repos\EC\lib".
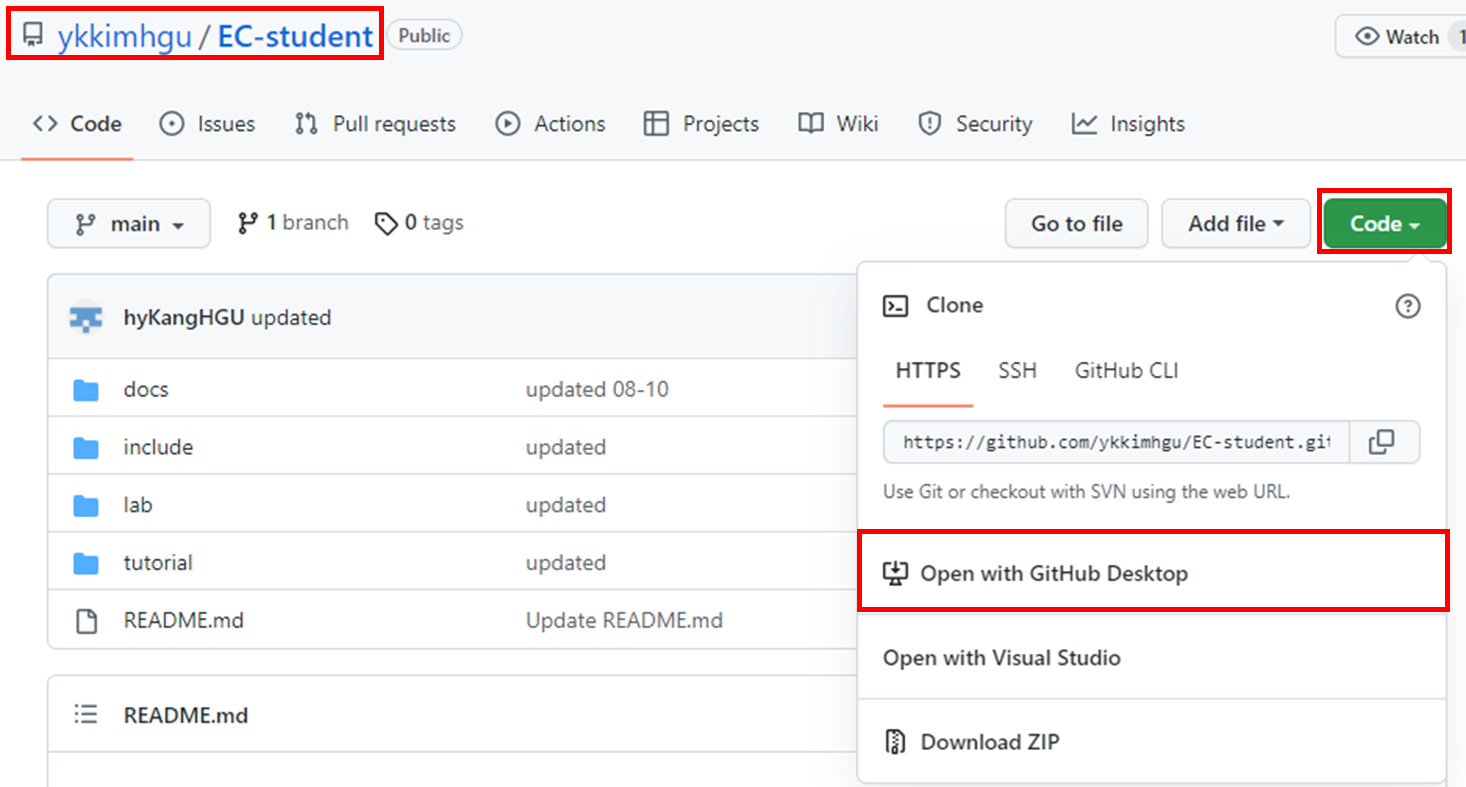
This is where you download or fetch the provided source codes used in EC lecture.
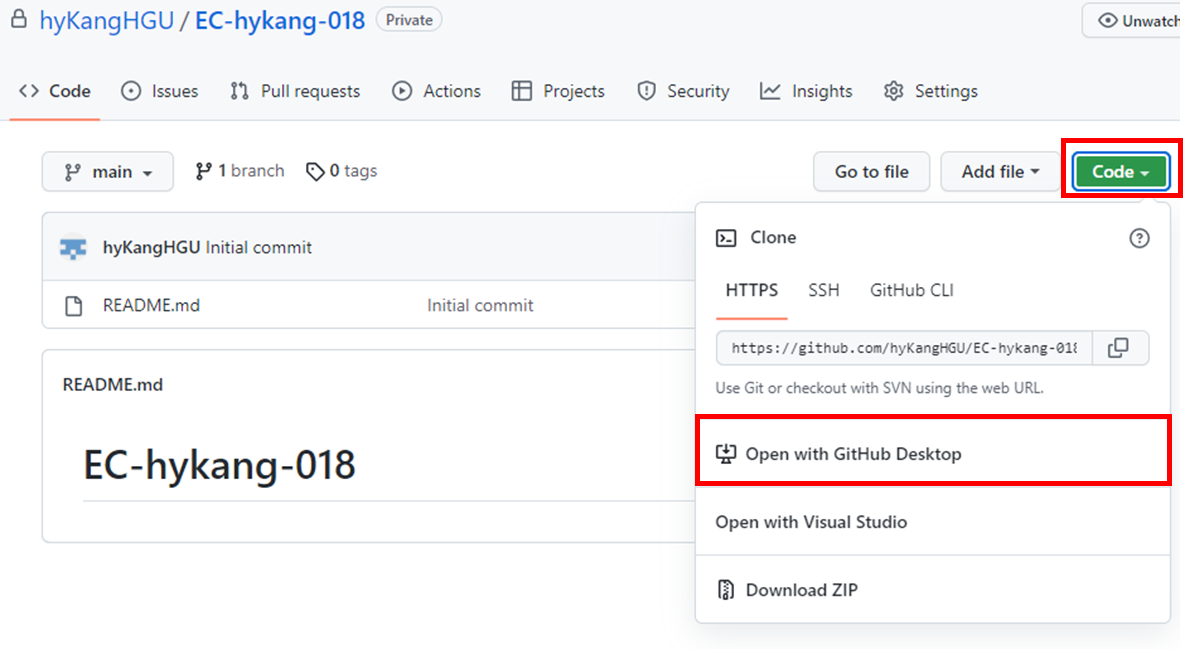
Open with Github Desktop.
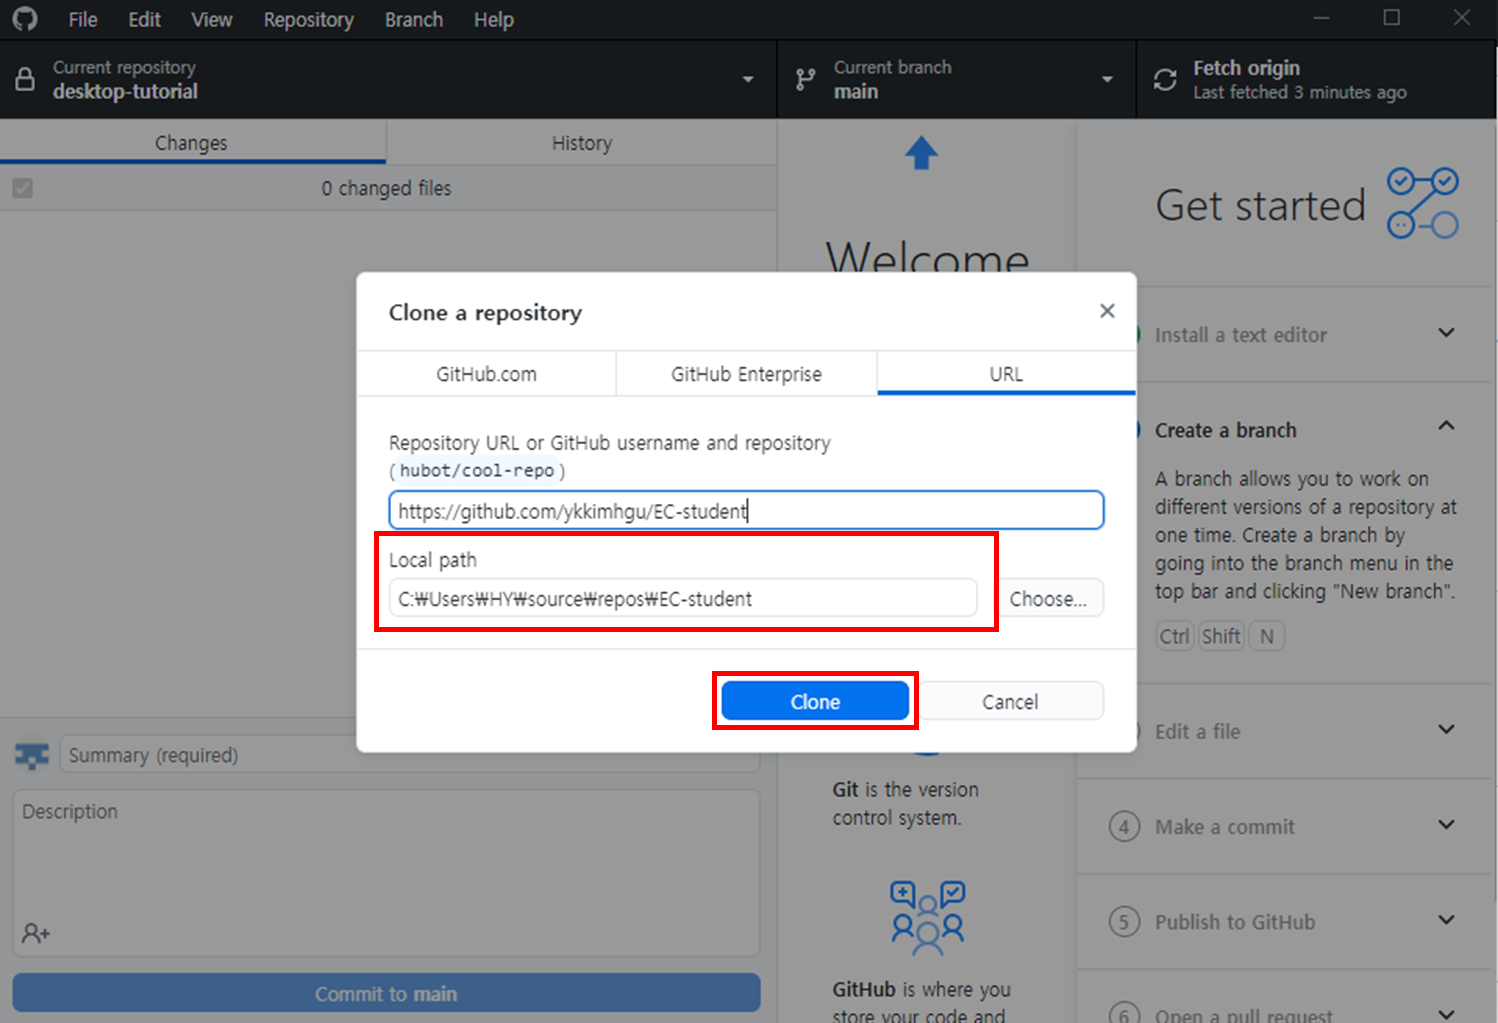
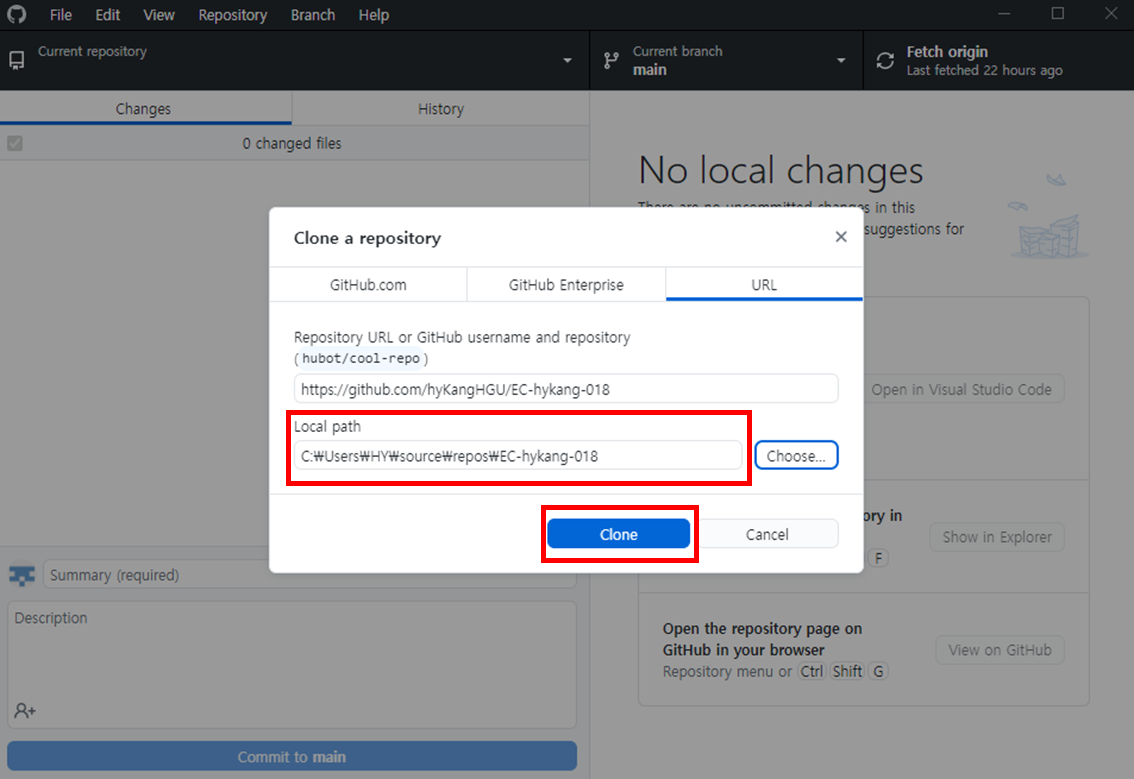
Check "Local path" and Click "Clone".
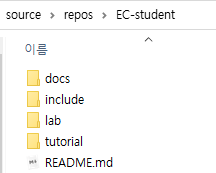
Then, you can see the repository "EC-student" is copied in your local PC.
You can copy & paste some files for tutorial or lab.
This is for managing the version of your library and your source file. DO NOT include the project related files.
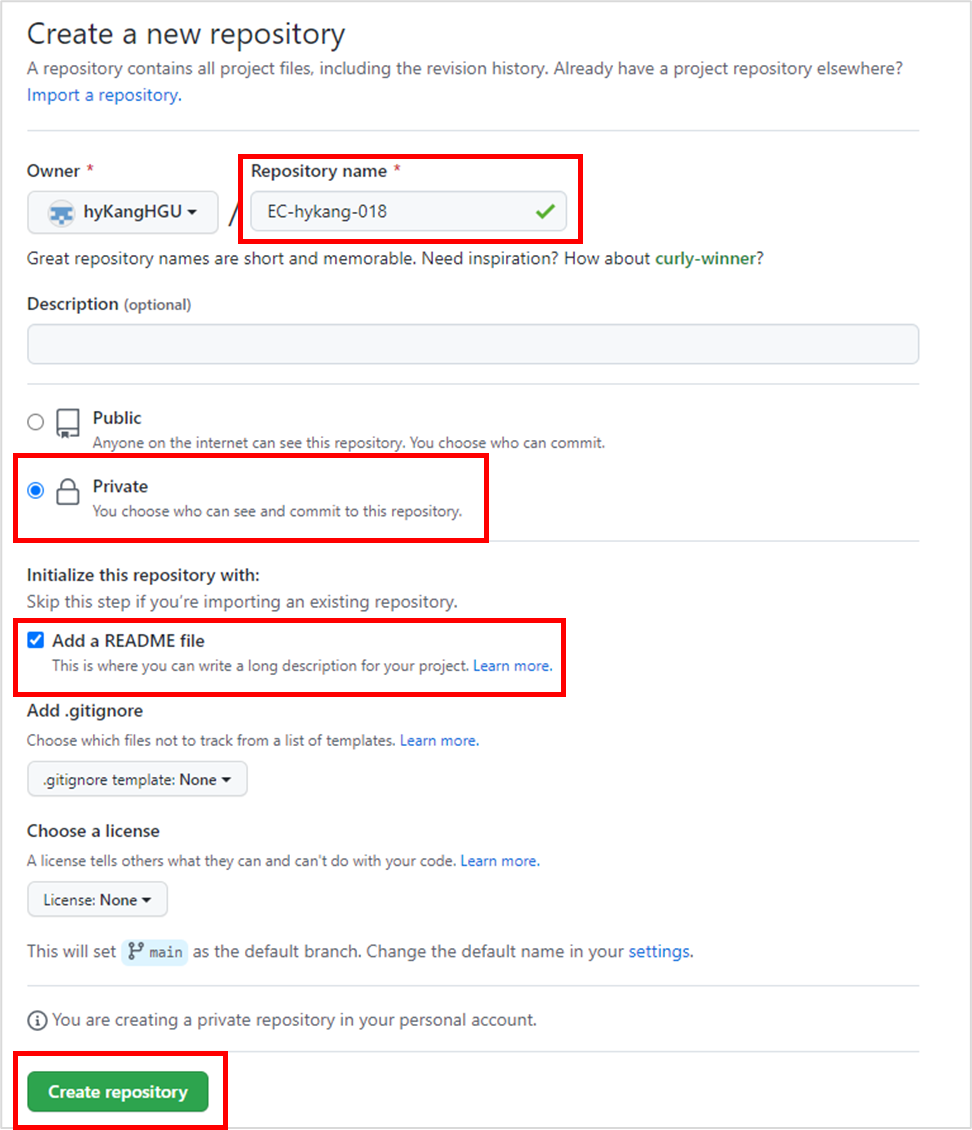
Create a new repository in Github.
Repository name : EC-(your initials)-(3 ends of student number)
You must choose Private.
Add a README file.
Open with Github Desktop from github repository
Check "Local path", and click "clone".
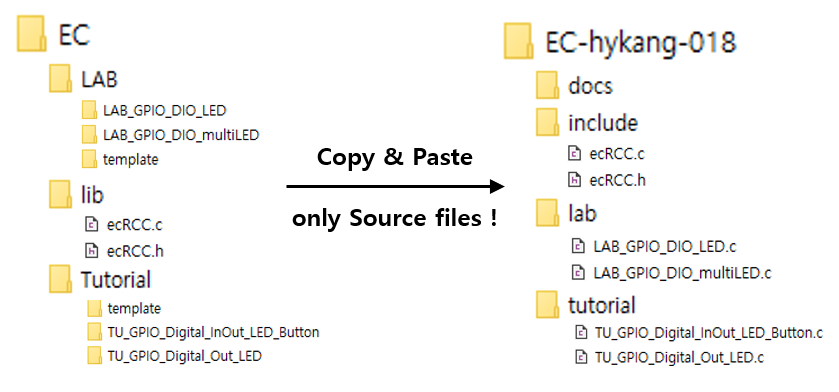
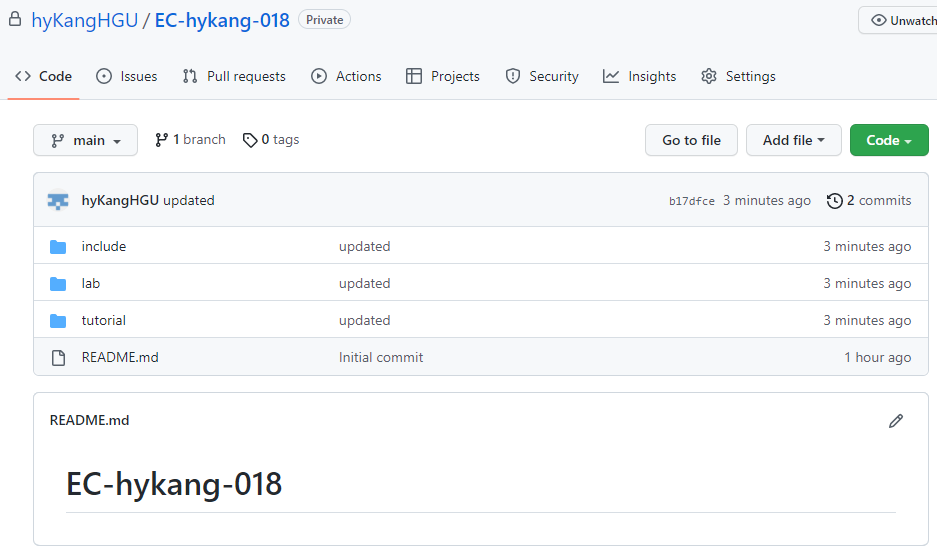
docs : documents for functions
include : includes header files
lab : includes report and source files
tutorial : includes source files
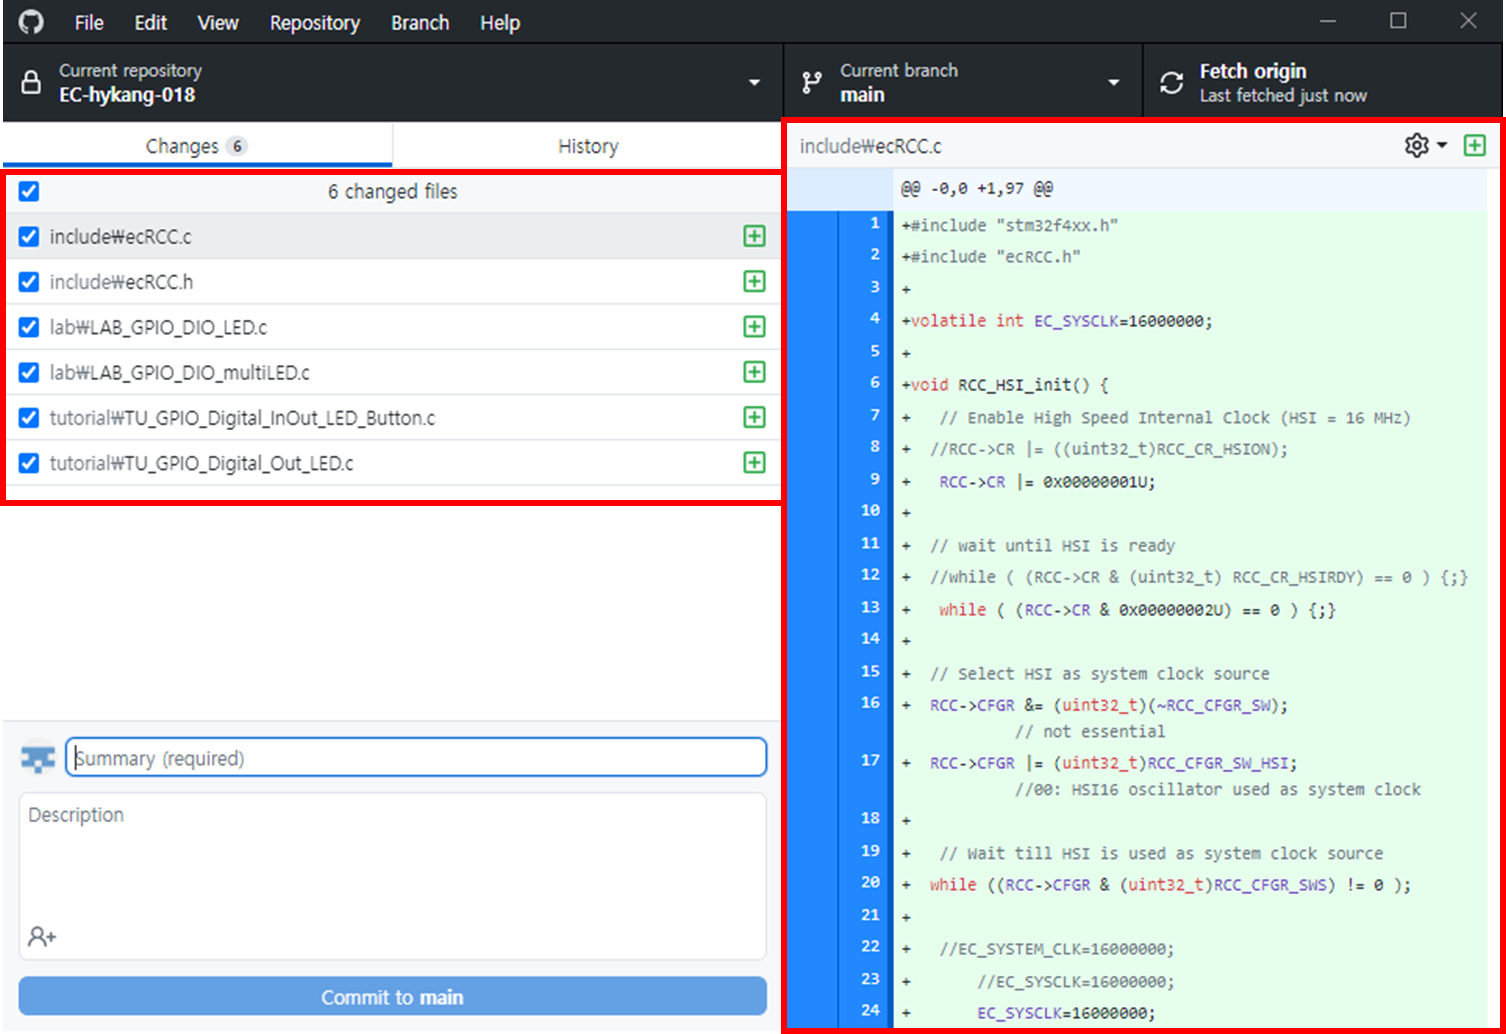
Copy & paste only source files from your project directory.
Github Desktop shows changed things.
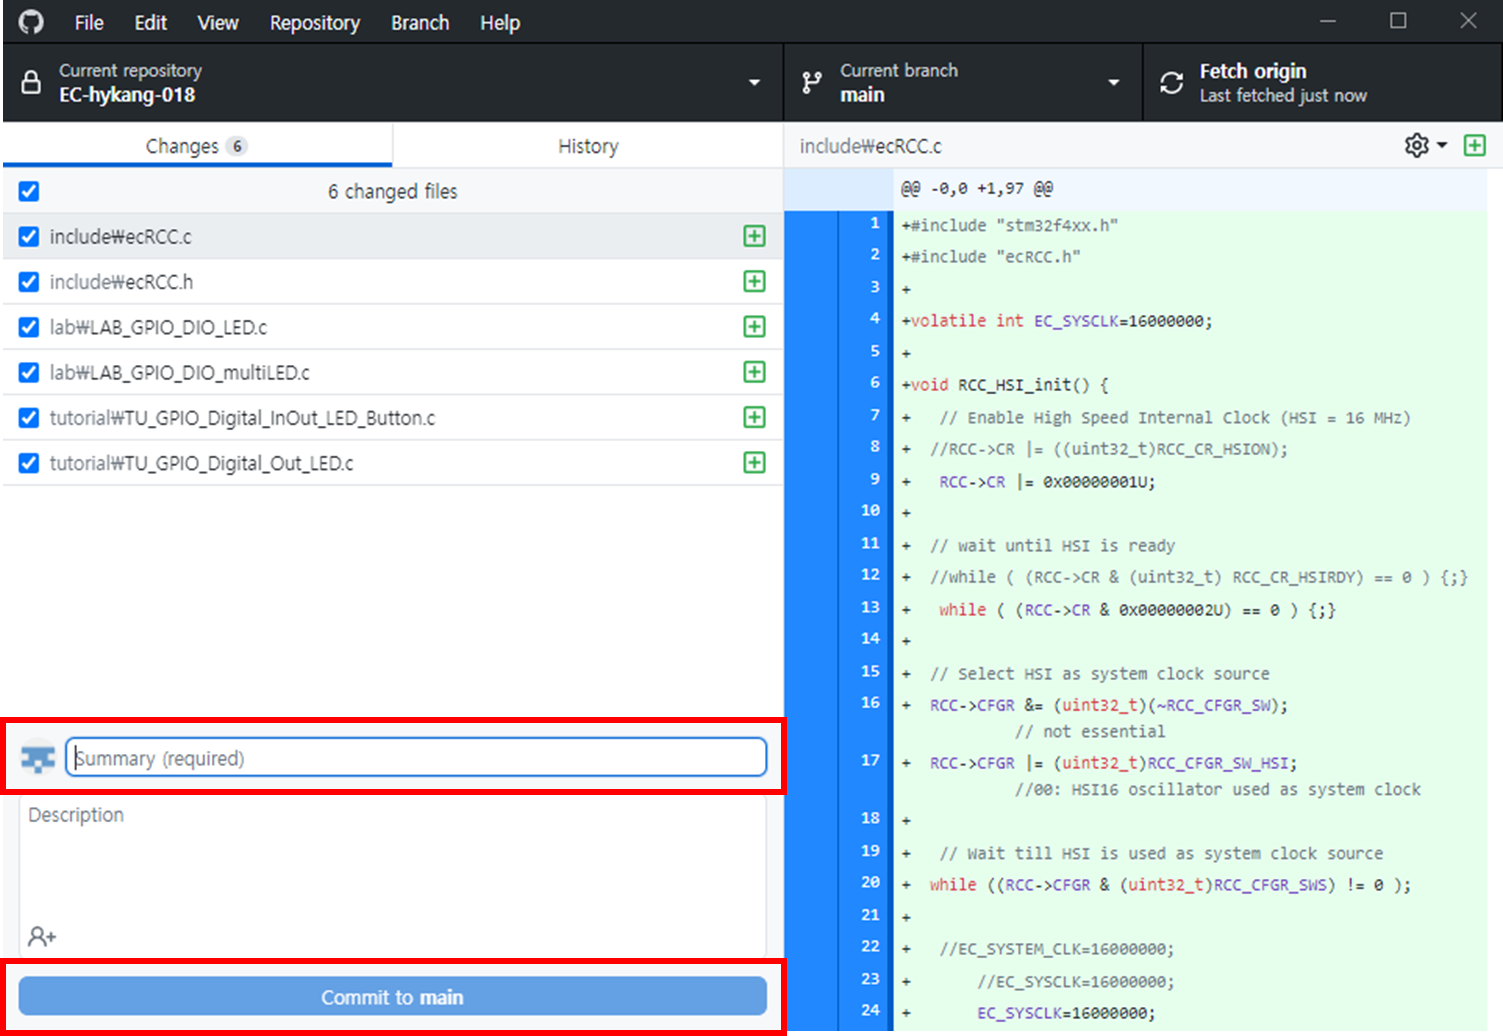
Commit : records the modified things.
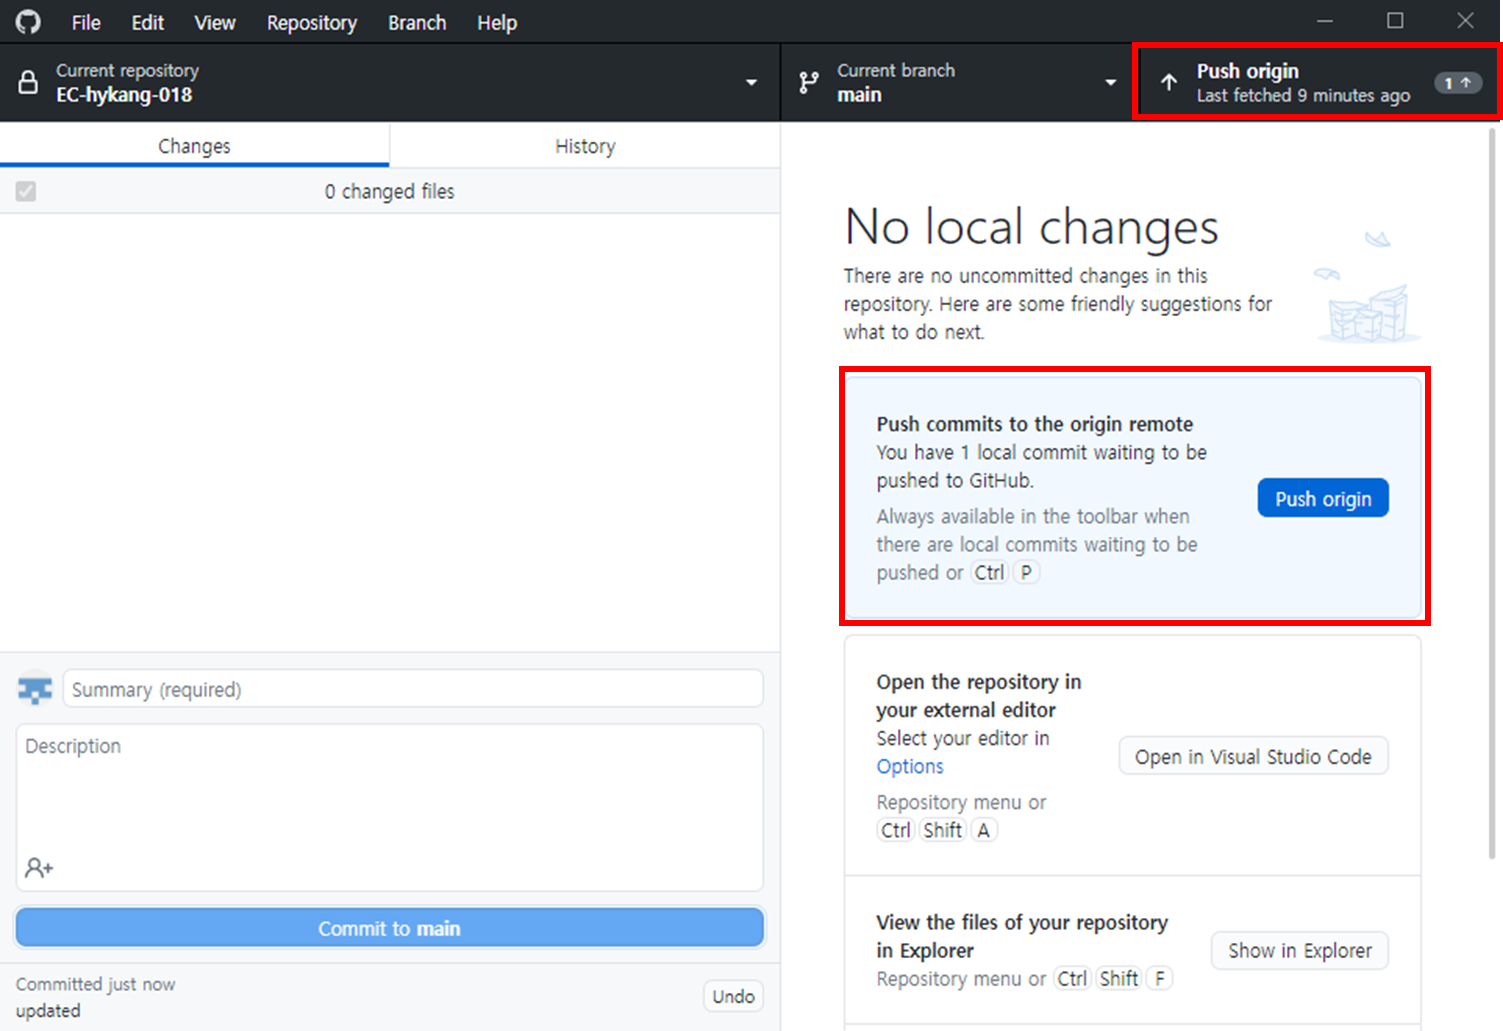
Push to github
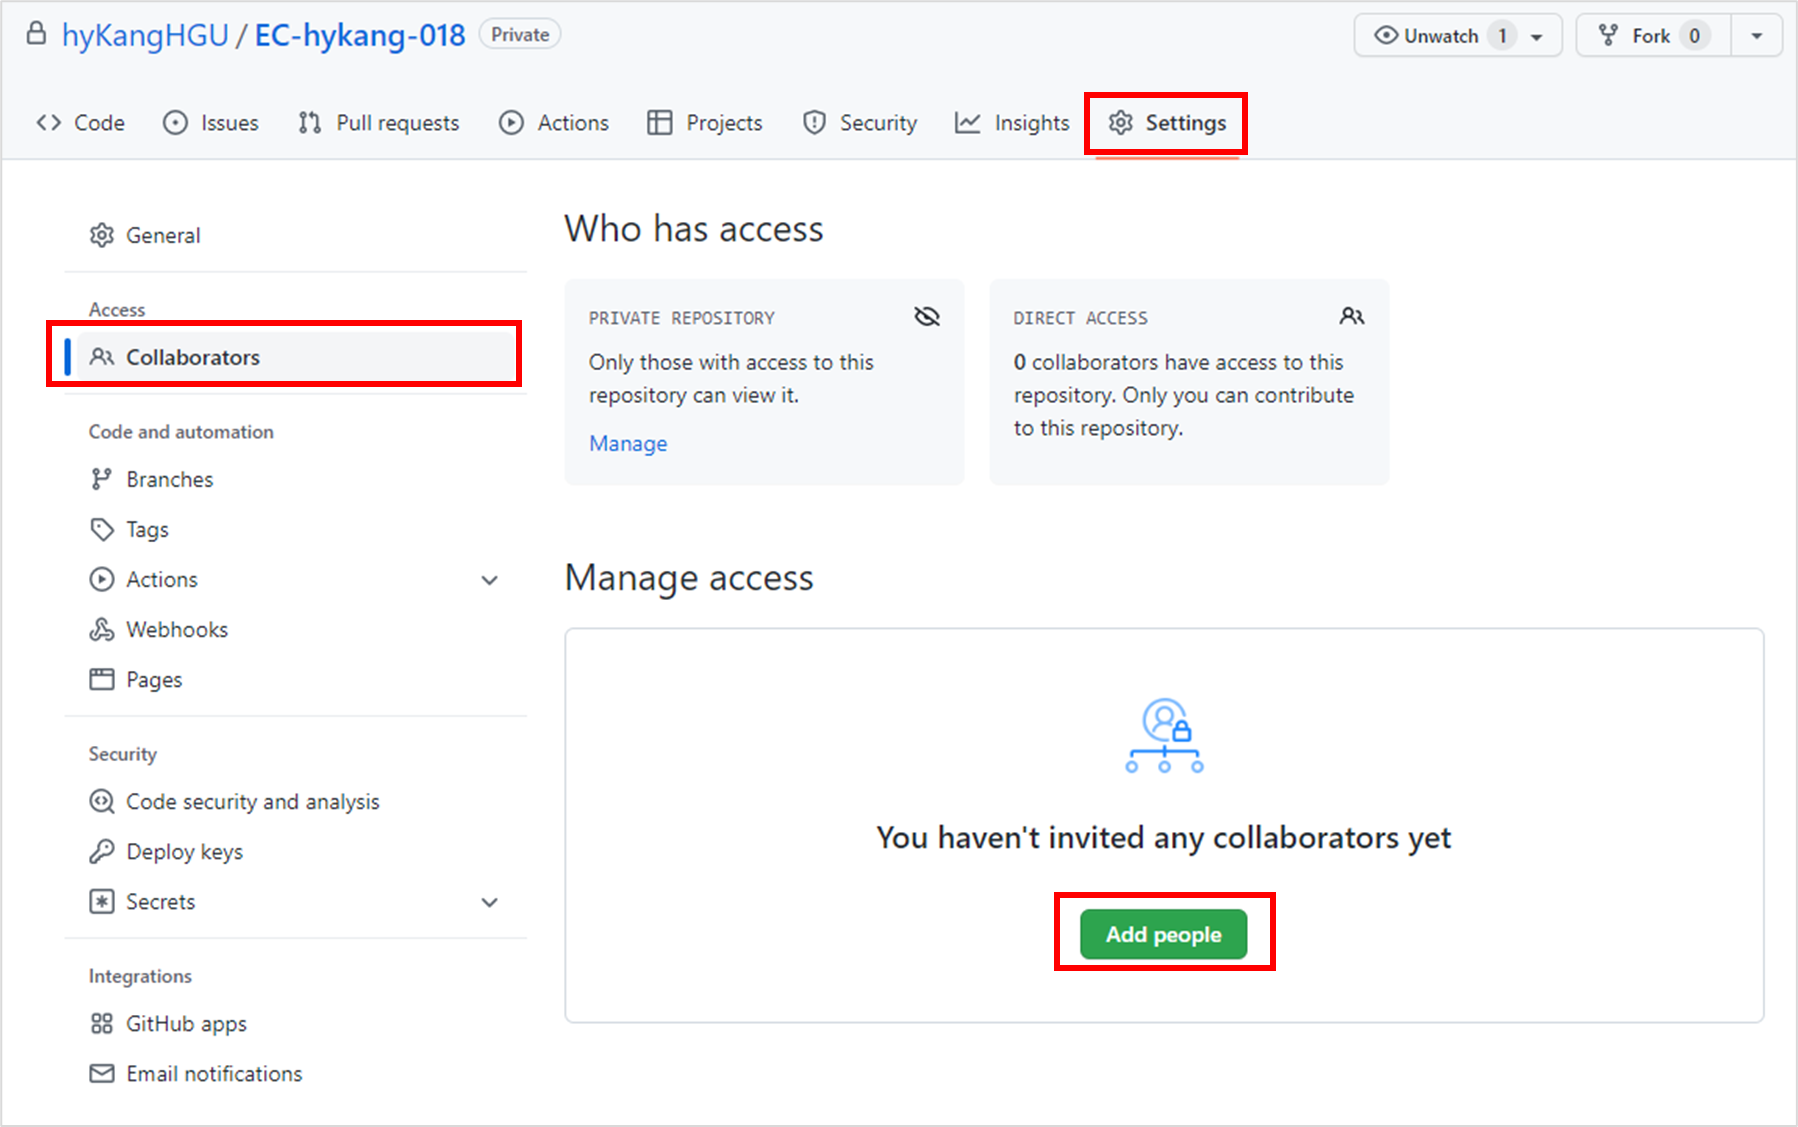
Click [Settings] - [Collaborators] - [Add people]
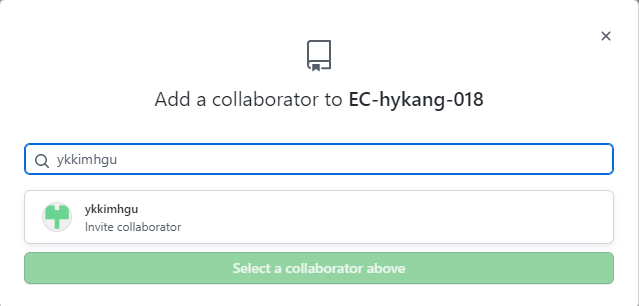
Search professor and TA id and add them as collaborator.
ykkimhgu
ckdals9150